Create a CDN resource
A CDN resource connects an origin to CDB edge servers, which cache content and are hosted in geographically distributed data centers located closer to end users. An origin is required to create the resource in the CDB Technical Web Portal; create it during setup or reuse an existing origin group. To route production traffic through the CDN, access to the domain's DNS provider or registrar is required to complete the DNS setup, either by adding a CNAME record or by delegating the DNS zone.
- 1
Open the creation form
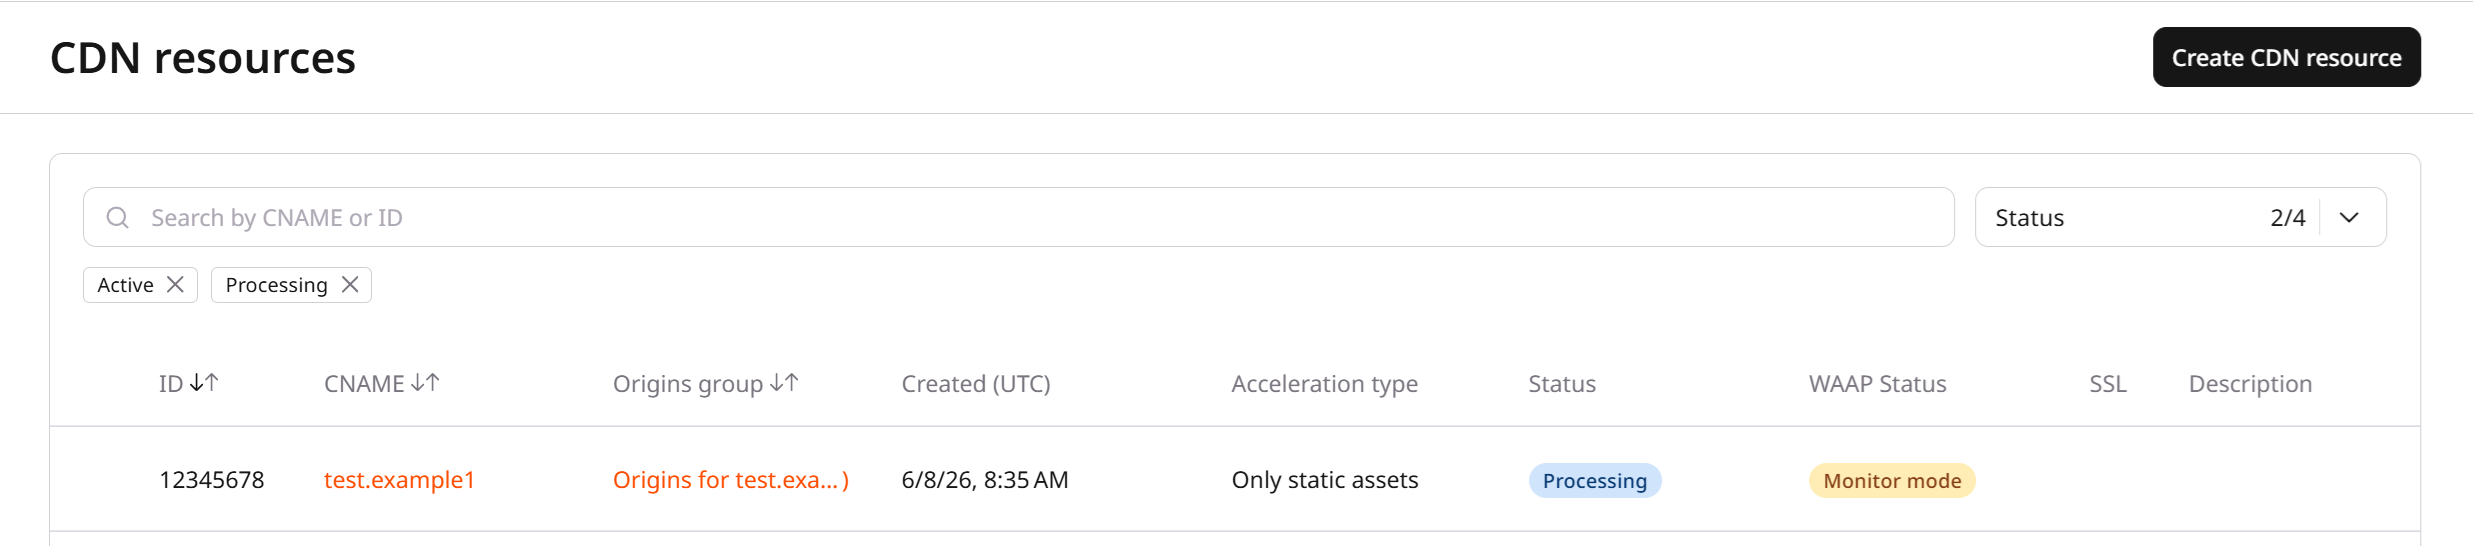
In the Customer Portal, navigate to CDN > CDN resources and click Create CDN resource.
- 2
Select DNS management
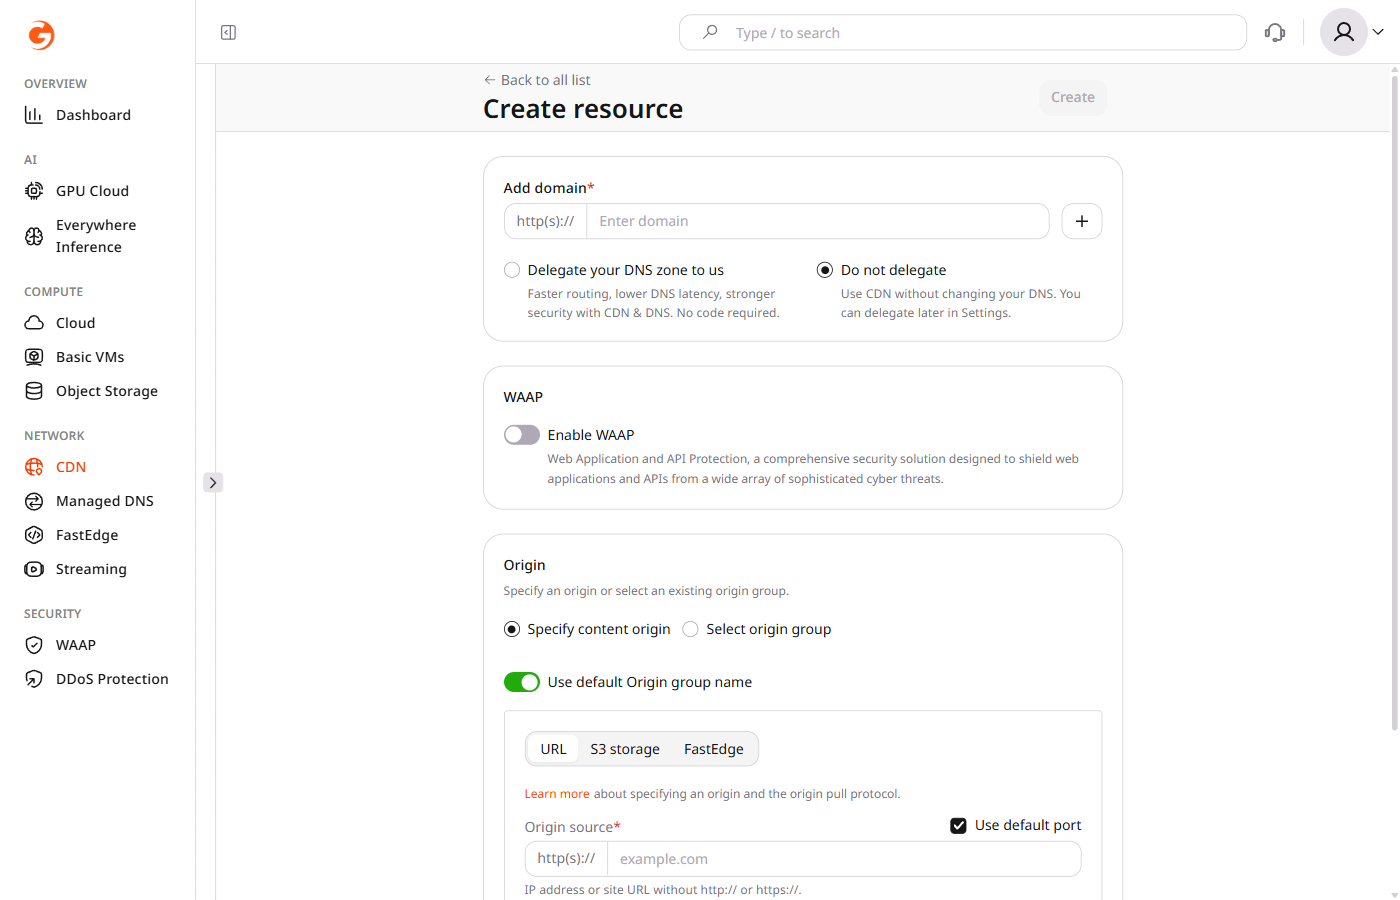
Select how traffic will be directed to the CDN:
- Do not delegate keeps DNS at the current provider. After creating the resource, add a CNAME record that points the CDN subdomain to the
*.gcdn.covalue shown in the CDN resource's Setup guide. - Delegate your DNS zone to us uses delegated DNS to create or reuse a zone in CDB Managed DNS. After creating the resource, point the delegated zone to the CDB nameservers — at the registrar for a root domain, or as NS records in the parent zone for a subdomain.
Select the DNS option before entering other form data. Switching between the options later clears the domain and origin values after confirmation.
- Do not delegate keeps DNS at the current provider. After creating the resource, add a CNAME record that points the CDN subdomain to the
- 3
Add the domain
In Add domain, enter the domain to deliver through the CDN:
- For Do not delegate, enter a subdomain —
cdn.example.com. - For delegated DNS, enter the domain whose DNS zone will be delegated —
example.comorstore.example.com.
The primary CNAME cannot be edited after creation. To add more domains later, use Add CNAME in the resource settings.
- For Do not delegate, enter a subdomain —
- 4
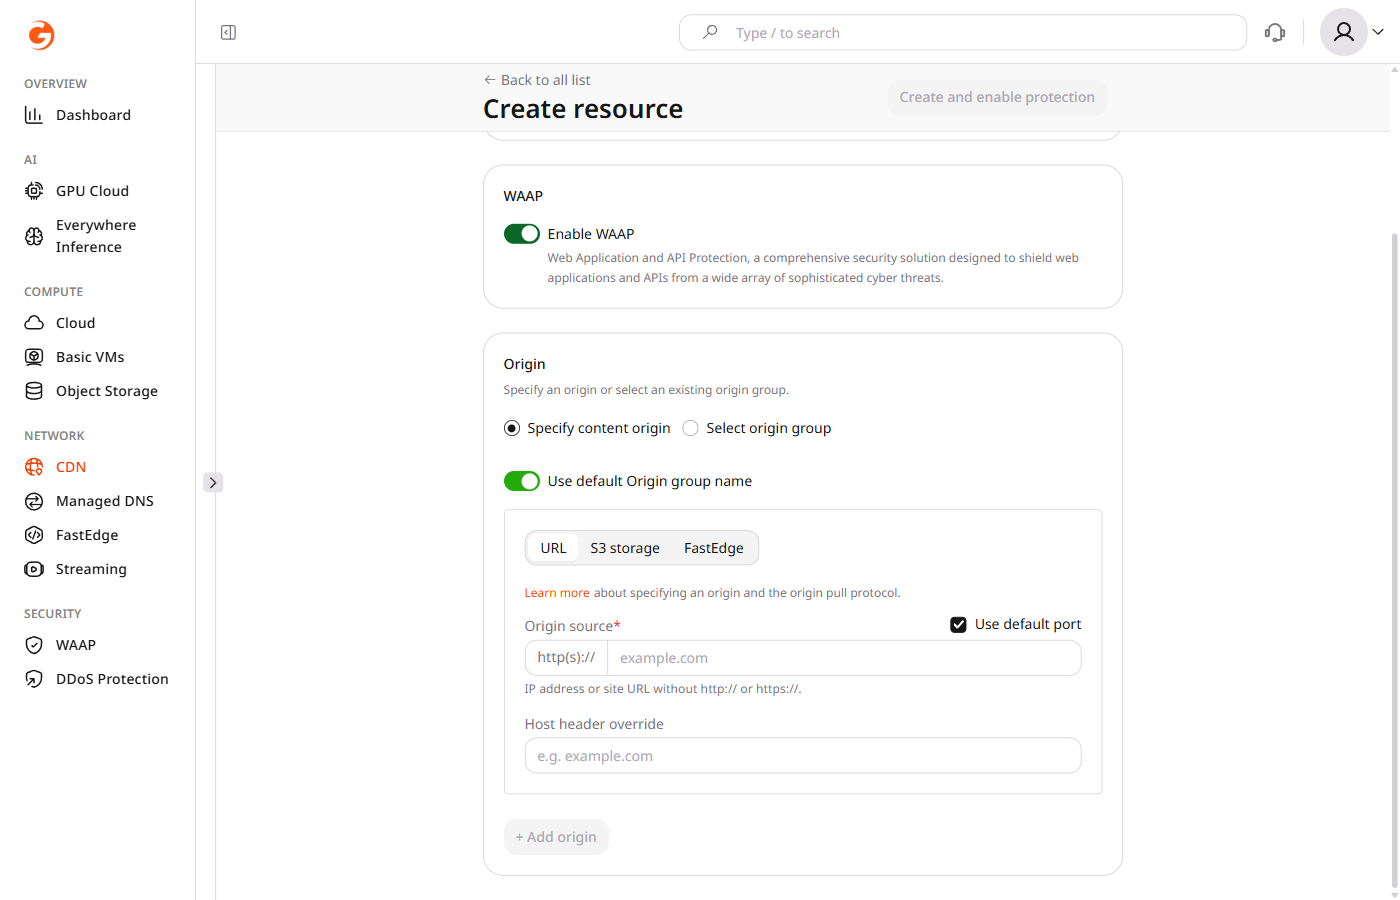
(Optional) Enable WAAP
Select Enable WAAP to add Web Application and API Protection, which provides Layer 7 DDoS protection and web application security. After creation, complete the WAAP setup.
- 5
Configure the origin
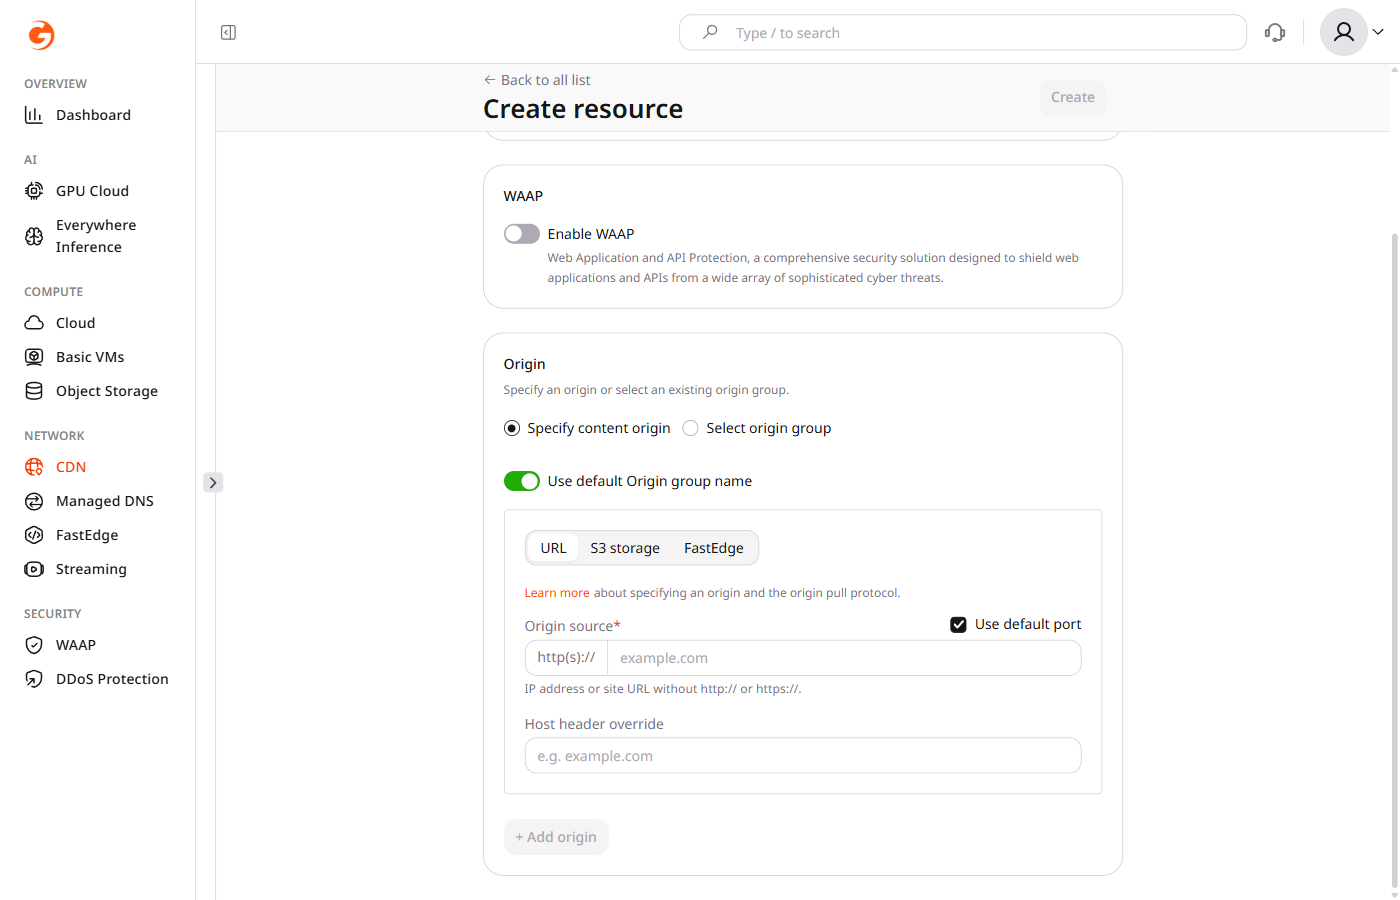
The origin settings depend on the DNS option:
- For Do not delegate, select Specify content origin to add an origin or Select origin group to reuse an existing origin group. A new origin can use a URL, S3 storage, or CDB EdgeCompute application. For CDB Object Storage, open the S3 storage tab, keep CDB selected, then choose a Storage and Bucket. Access keys are not entered. Create storage and Create bucket are available in those lists. Only Standard storage is supported. Egress from CDB Object Storage to the CDN is not billed. Amazon and Other still require access keys. Configure the port and host header when the origin requires non-default values, and click Add origin to add another source.
- For delegated DNS, the portal resolves the domain to determine the origin. If no server address is found, enter it in Enter your origin IP so we can connect to your site.
- 6
Create the resource
Click Create. If WAAP is enabled, click Create and enable protection.
With delegated DNS, a DNS zone already exists dialog can appear. Select Use existing zone to add the generated records to that zone, or Create separate zone to create an independent zone for the entered domain.
- 7
Complete DNS setup
Follow the instructions shown after creation for the selected DNS option.
For Do not delegate, add a CNAME record at the DNS provider:
Field Value Name / Host The entered subdomain — cdn.example.comValue / Points to The *.gcdn.covalue shown in the CDN resource's Setup guideCreate one record for each custom domain.
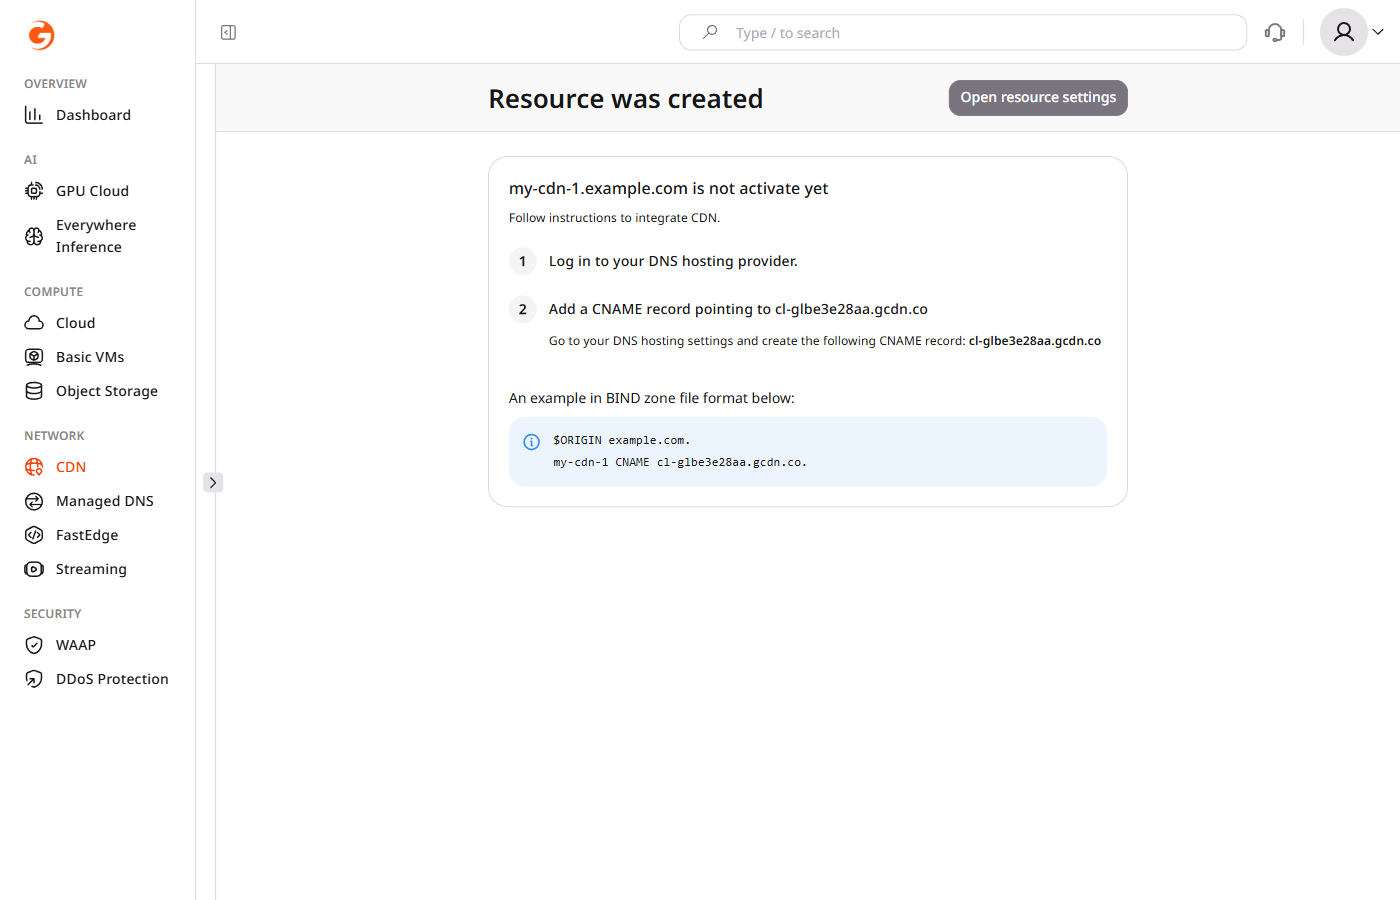
For delegated DNS, point the zone to these CDB nameservers:
ns1.gcorelabs.net ns2.gcdn.services- For a root domain (
example.com), replace the current nameservers at the registrar with the CDB nameservers. - For a subdomain (
store.example.com), add NS records for that subdomain in the parent DNS zone (example.com). Do not replace the parent domain's nameservers at the registrar.
DNS updates can take up to 24 hours.
Before integrating the resource with the website, open Setup guide in the CDN resource settings and click Check DNS setup status.
- For a root domain (
- 8
Integrate the resource with the website
For Do not delegate, update static file URLs to use the CDN subdomain — change
example.com/images/image.jpgtocdn.example.com/images/image.jpg.Sites built on WordPress, Joomla, Drupal, or another CMS can use an integration plugin to replace domains in asset paths. The CMS integration guide lists supported systems.
Delegated DNS routes the domain through the CDN after the nameserver update, so individual asset URLs do not need to be changed.
- 9
(Optional) Add details and advanced settings
Click Open resource settings. Add notes in Description, add more custom domains with Add CNAME, or configure other delivery settings.
Resource creation troubleshooting
If content is not served through the CDN after setup, verify the following:
- The CNAME record, registrar nameservers, or parent-zone NS records match the values shown in the CDN resource's Setup guide.
- DNS propagation has completed.
- For Do not delegate, static file URLs use the CDN subdomain.
If the issue persists, contact CDB Support.