Use an AWS S3 static website as a CDN origin
Orange's CDN can cache and deliver objects from a public Amazon S3 static website endpoint. A private S3 origin is required when objects must not be exposed by a public-read bucket policy.
The public-read policy in this procedure allows anyone to retrieve matching bucket objects. Do not use it for private or sensitive content.
S3 website and CDN resource
- 1
Create and populate the S3 bucket
1. Log in to the AWS Management Console and open Amazon S3.
2. Create a General purpose bucket and select its AWS Region.
3. Upload the website objects, including
index.htmlandlogo.png. The verification steps below requestlogo.png. - 2
Allow public bucket policies
Account-level Block Public Access settings must permit public bucket policies. If those settings are centrally managed, contact the AWS account administrator before changing the bucket.
1. Open the bucket and select Permissions.
2. Under Block public access (bucket settings), click Edit.
3. Clear Block all public access.
4. Select I acknowledge that the current settings might result in this bucket and the objects within becoming public.
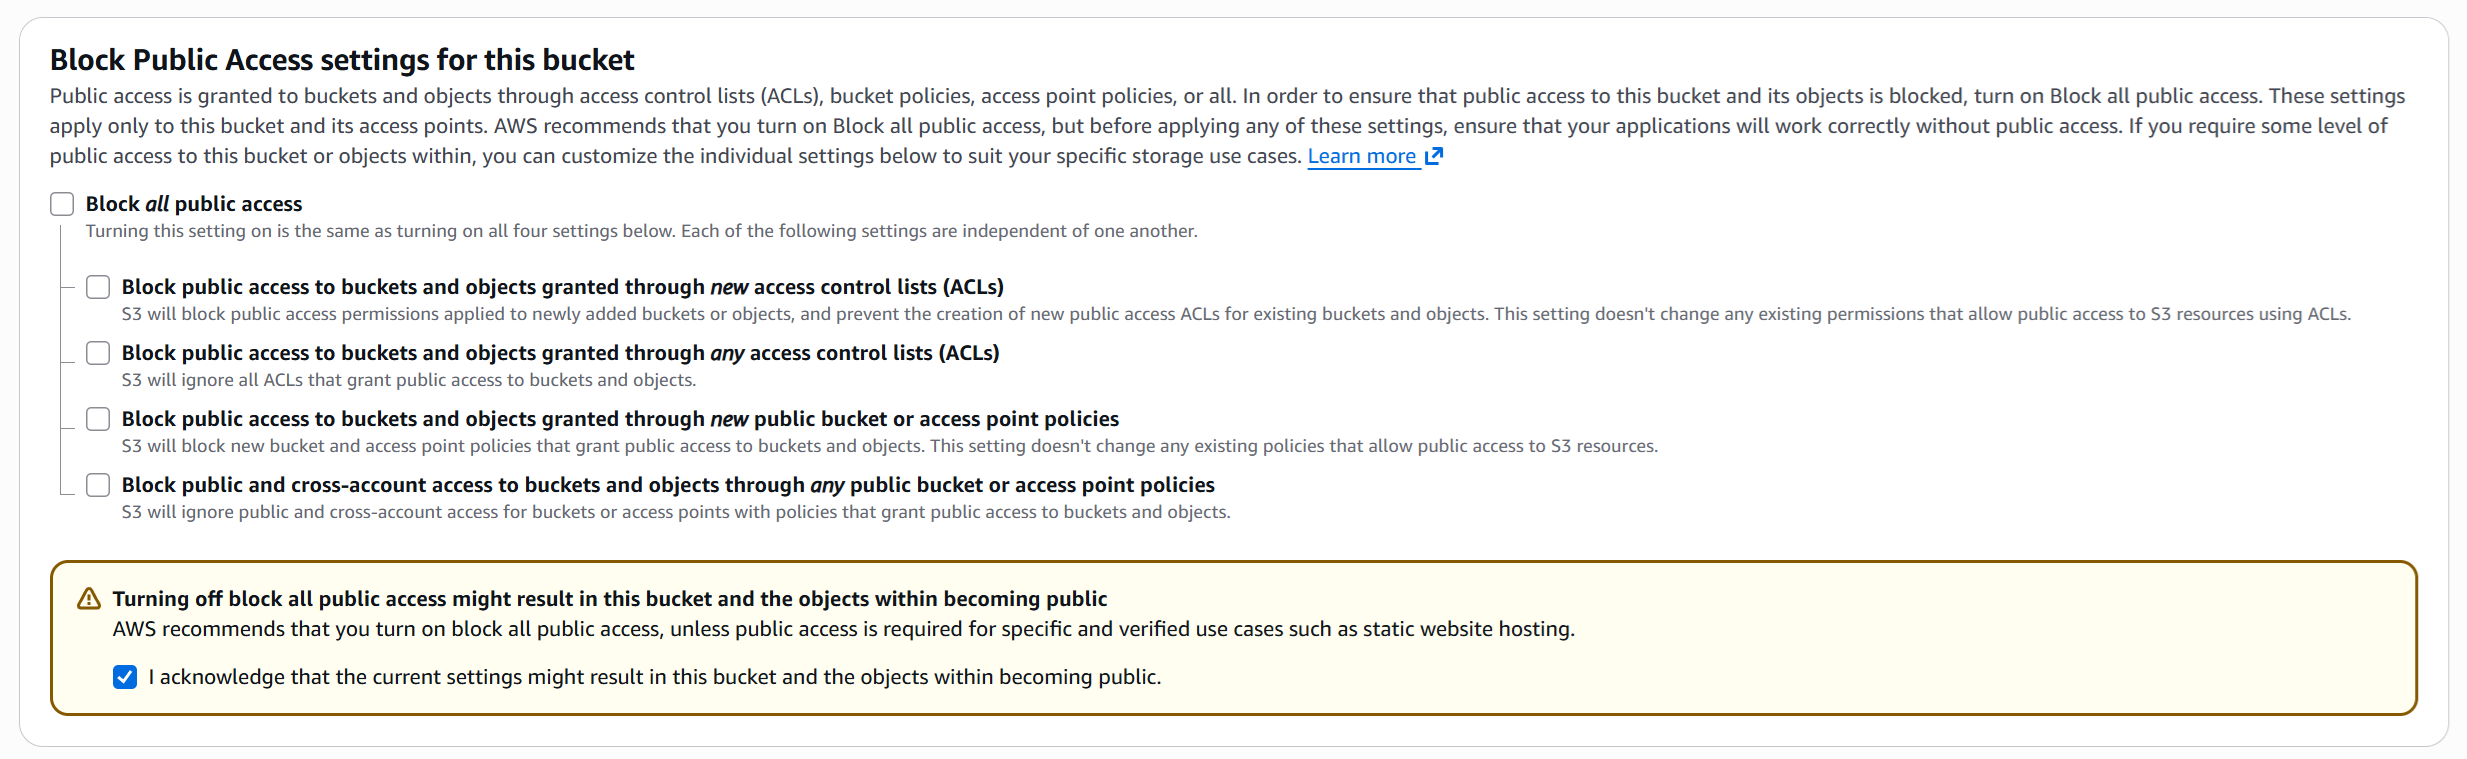
5. Click Save changes, then confirm the change in the dialog.
- 3
Enable static website hosting
1. Open the bucket's Properties tab.
2. Under Static website hosting, click Edit.
3. Set Static website hosting to Enable.
4. Set Hosting type to Host a static website.
5. In Index document, enter
index.htmlor the name of another uploaded default object.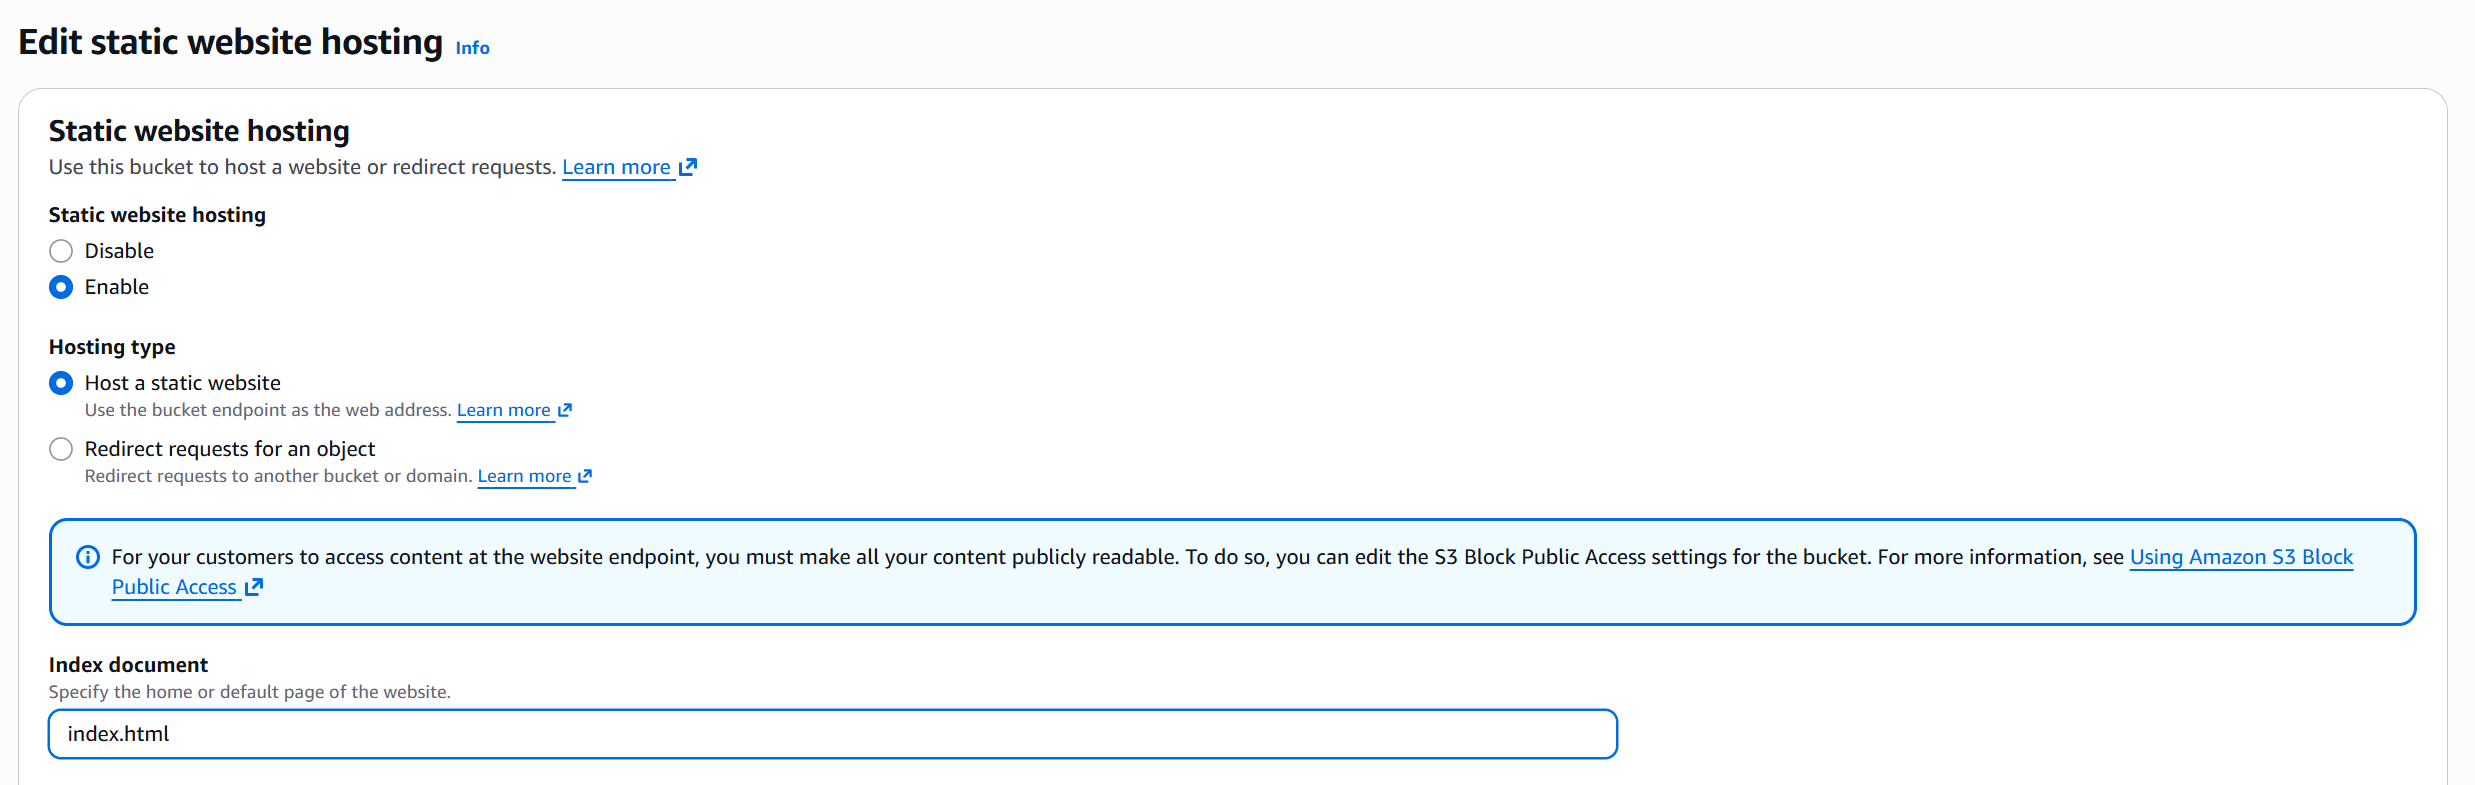
6. Click Save changes and copy the Bucket website endpoint.
Use the endpoint provided by AWS instead of constructing it manually because its format depends on the Region.
- 4
Add a public-read bucket policy
On the Permissions tab, click Edit under Bucket policy. Replace
my-bucketwith the bucket name in this policy:{ "Version": "2012-10-17", "Statement": [ { "Sid": "PublicReadGetObject", "Effect": "Allow", "Principal": "*", "Action": "s3:GetObject", "Resource": "arn:aws:s3:::my-bucket/*" } ] }Click Save changes.
- 5
Test the S3 website endpoint
Append
/logo.pngto the HTTP website endpoint copied from AWS and open the resulting URL.Confirm that the object loads without a
403or404response. Keep the URL on HTTP, because an S3 website endpoint does not accept HTTPS. - 6
Create the CDN resource
1. Log in to the CDB Customer Portal and navigate to CDN > CDN resources.
2. Click Create CDN resource.
3. In Add domain, enter the custom domain.
4. In Origin, keep Specify content origin selected.
5. Select URL.
6. Select HTTP as the origin pull protocol.
7. In Origin source, enter the S3 website endpoint without
http://and without an object path.8. Click Create.
The resource can stay in the Processing status at first, so wait until the status changes to Active before testing delivery.
- 7
Configure the custom domain
1. Configure the custom domain by pointing its CNAME record to the
*.gcdn.cohostname shown in the CDN resource's Setup guide.2. For HTTPS delivery, attach an SSL certificate to the custom domain.
- 8
Test delivery through the CDN
1. Open the verification object through the custom CDN domain:
https://cdn.site.com/logo.png2. Confirm that the object loads.
Creating a CDN resource does not rewrite absolute asset URLs in HTML or application code. If they still point to the S3 website endpoint or another origin domain, update them to the CDN domain. Then confirm in the browser Network panel that the requests use the CDN domain.