Getting started with managed DNS
To use Managed DNS, you need to create a DNS zone for your domain or subdomain in the CDB Technical Web Portal or via API and specify CDB's NS servers for your domain. You can then use CDB's DNS infrastructure features.
Create DNS zones
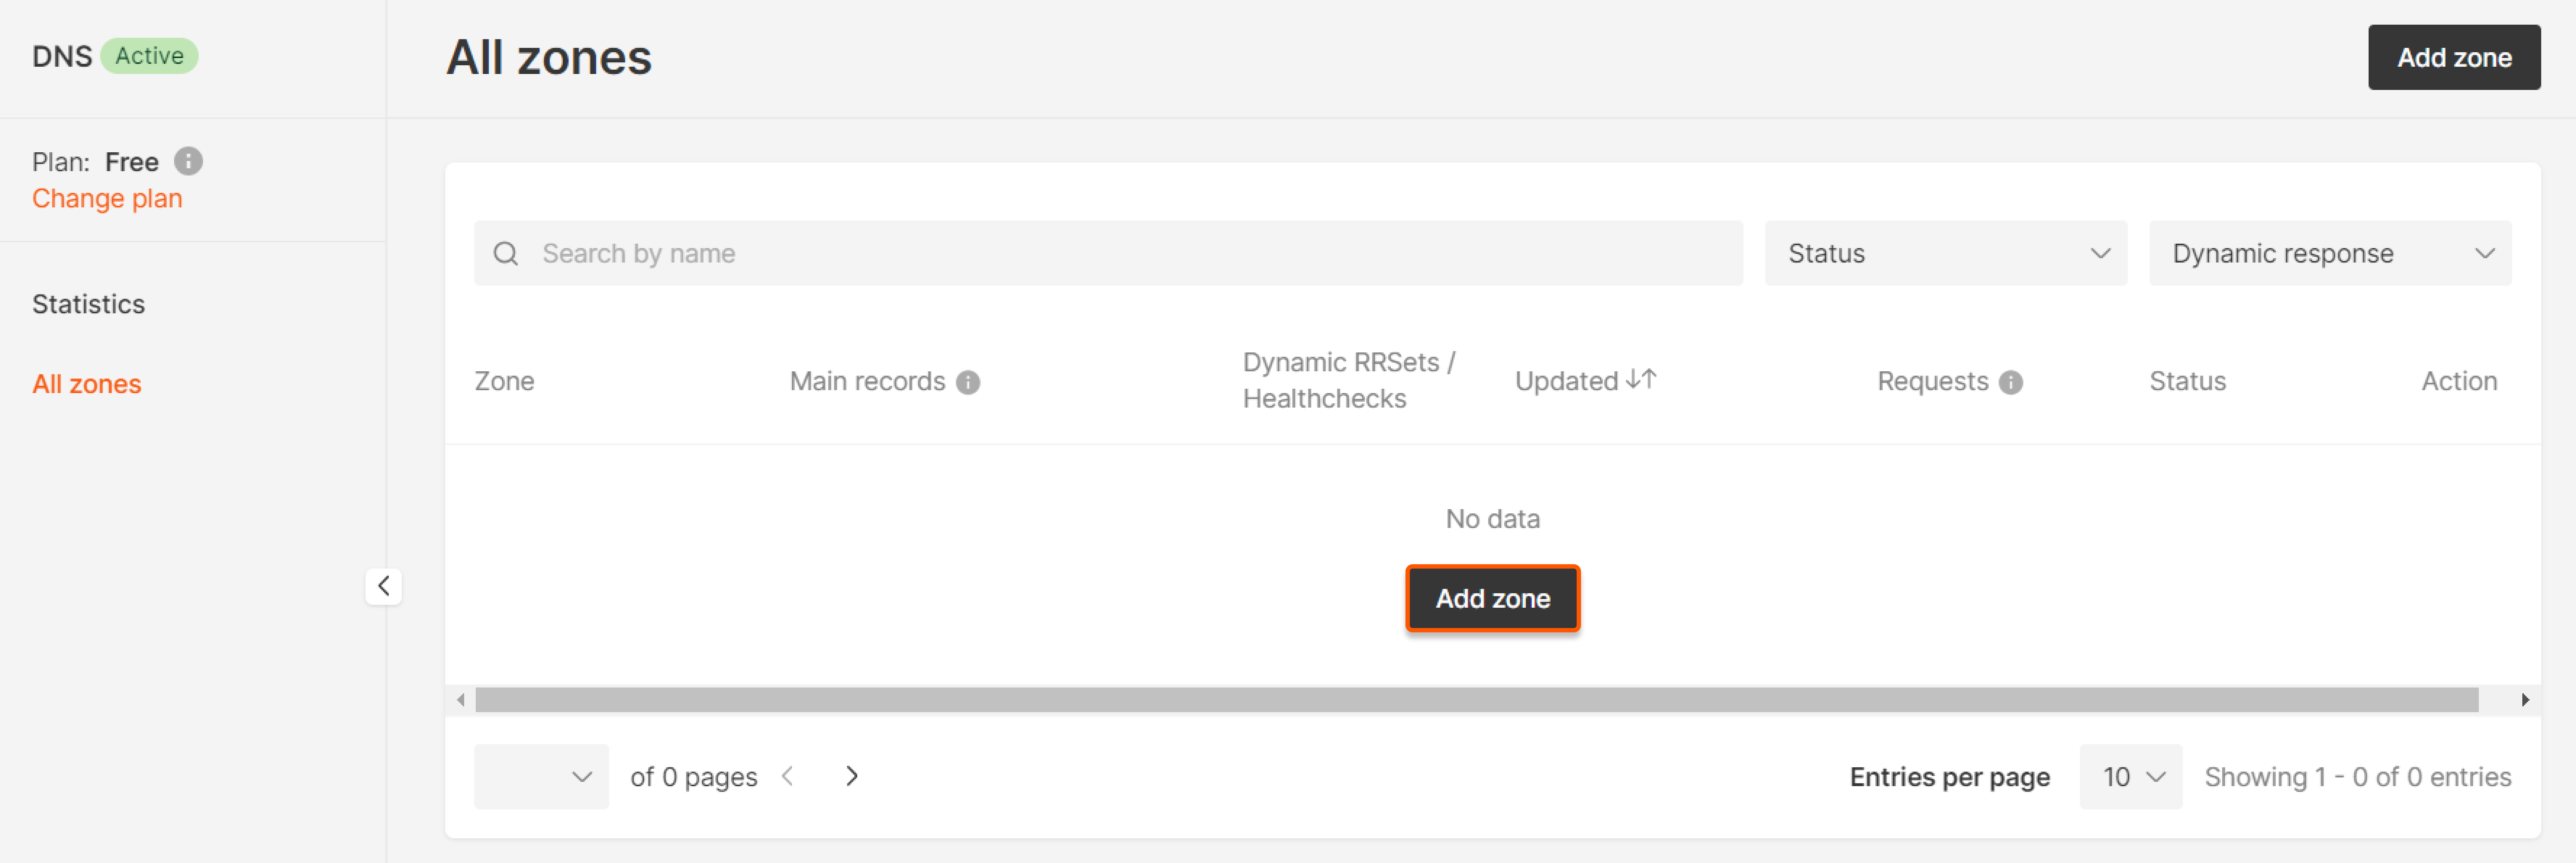
1. Navigate to DNS in the CDB Technical Web Portal and click Add zone.
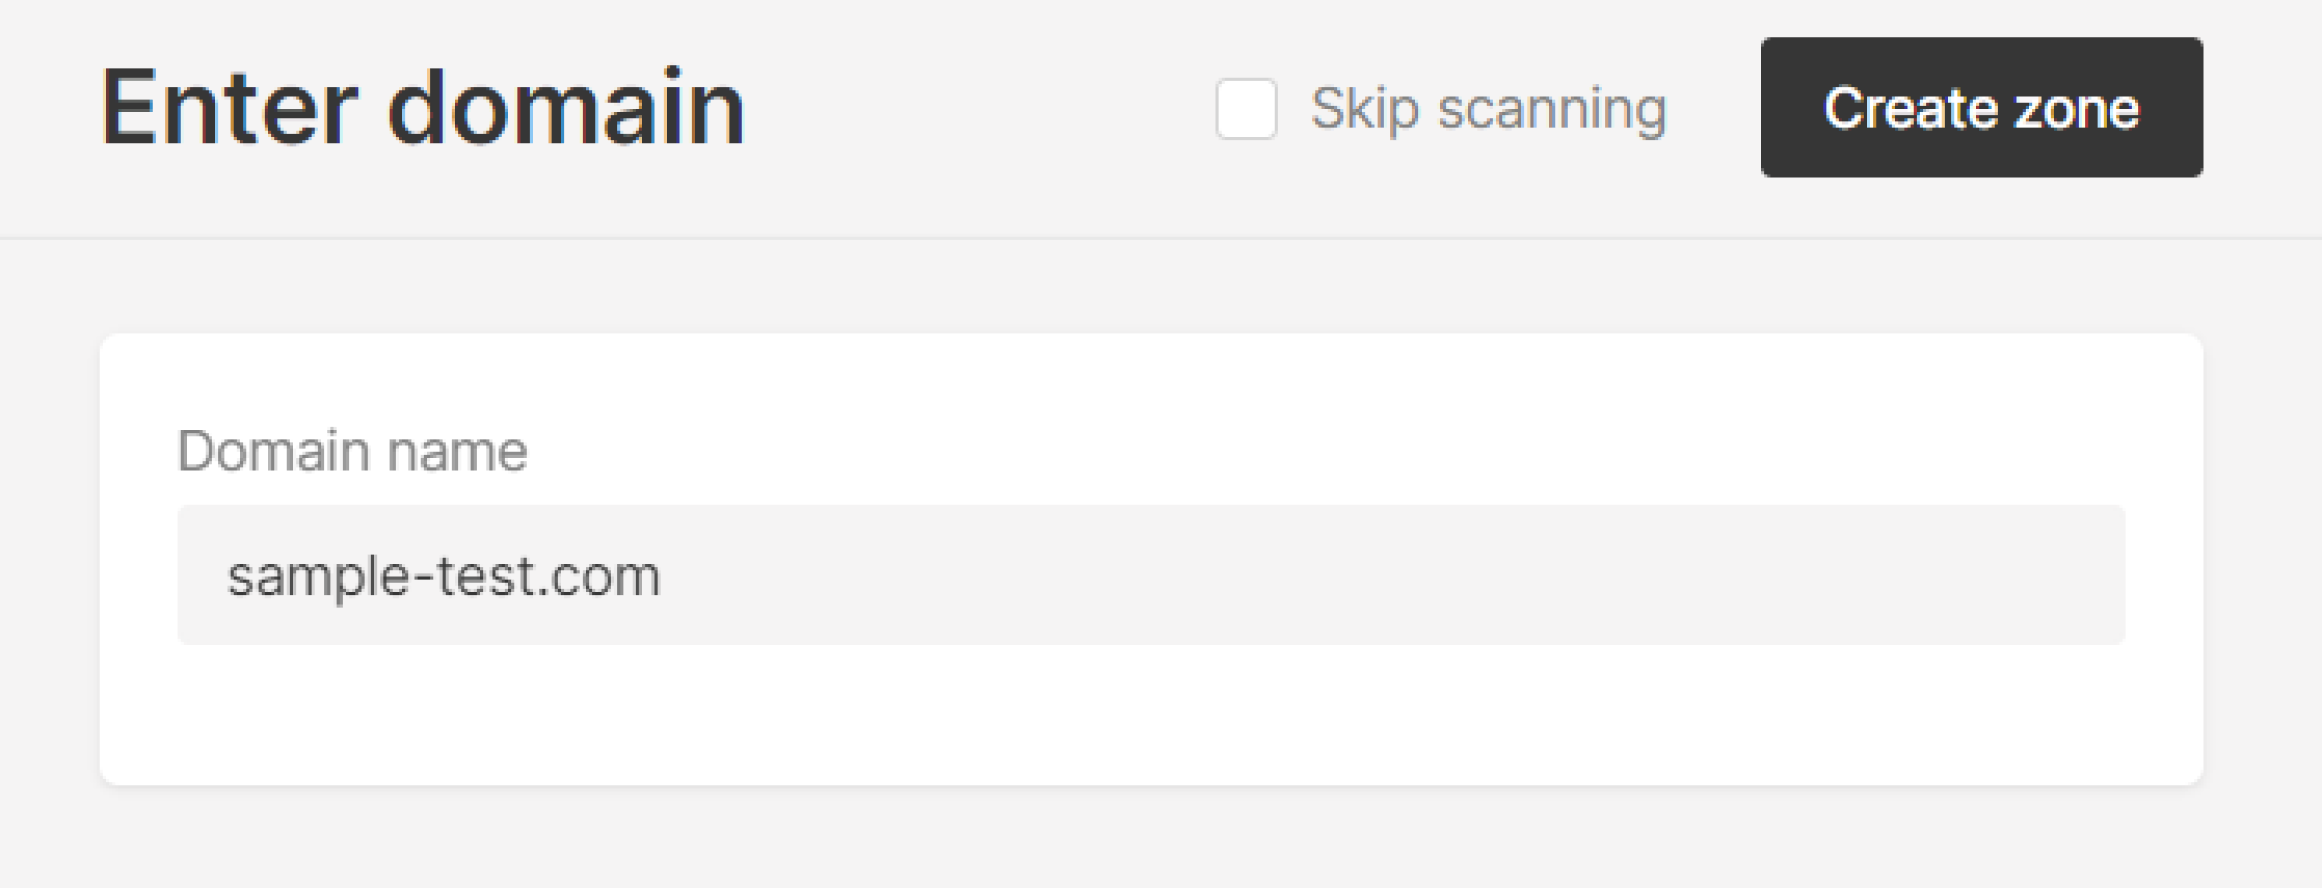
3. Enter a domain or subdomain name for the DNS zone and click Confirm.
Tip
You can opt to skip validation and automatic addition of domain DNS records created earlier by checking the "Skip scanning" box. If you choose this option, go to step 5.
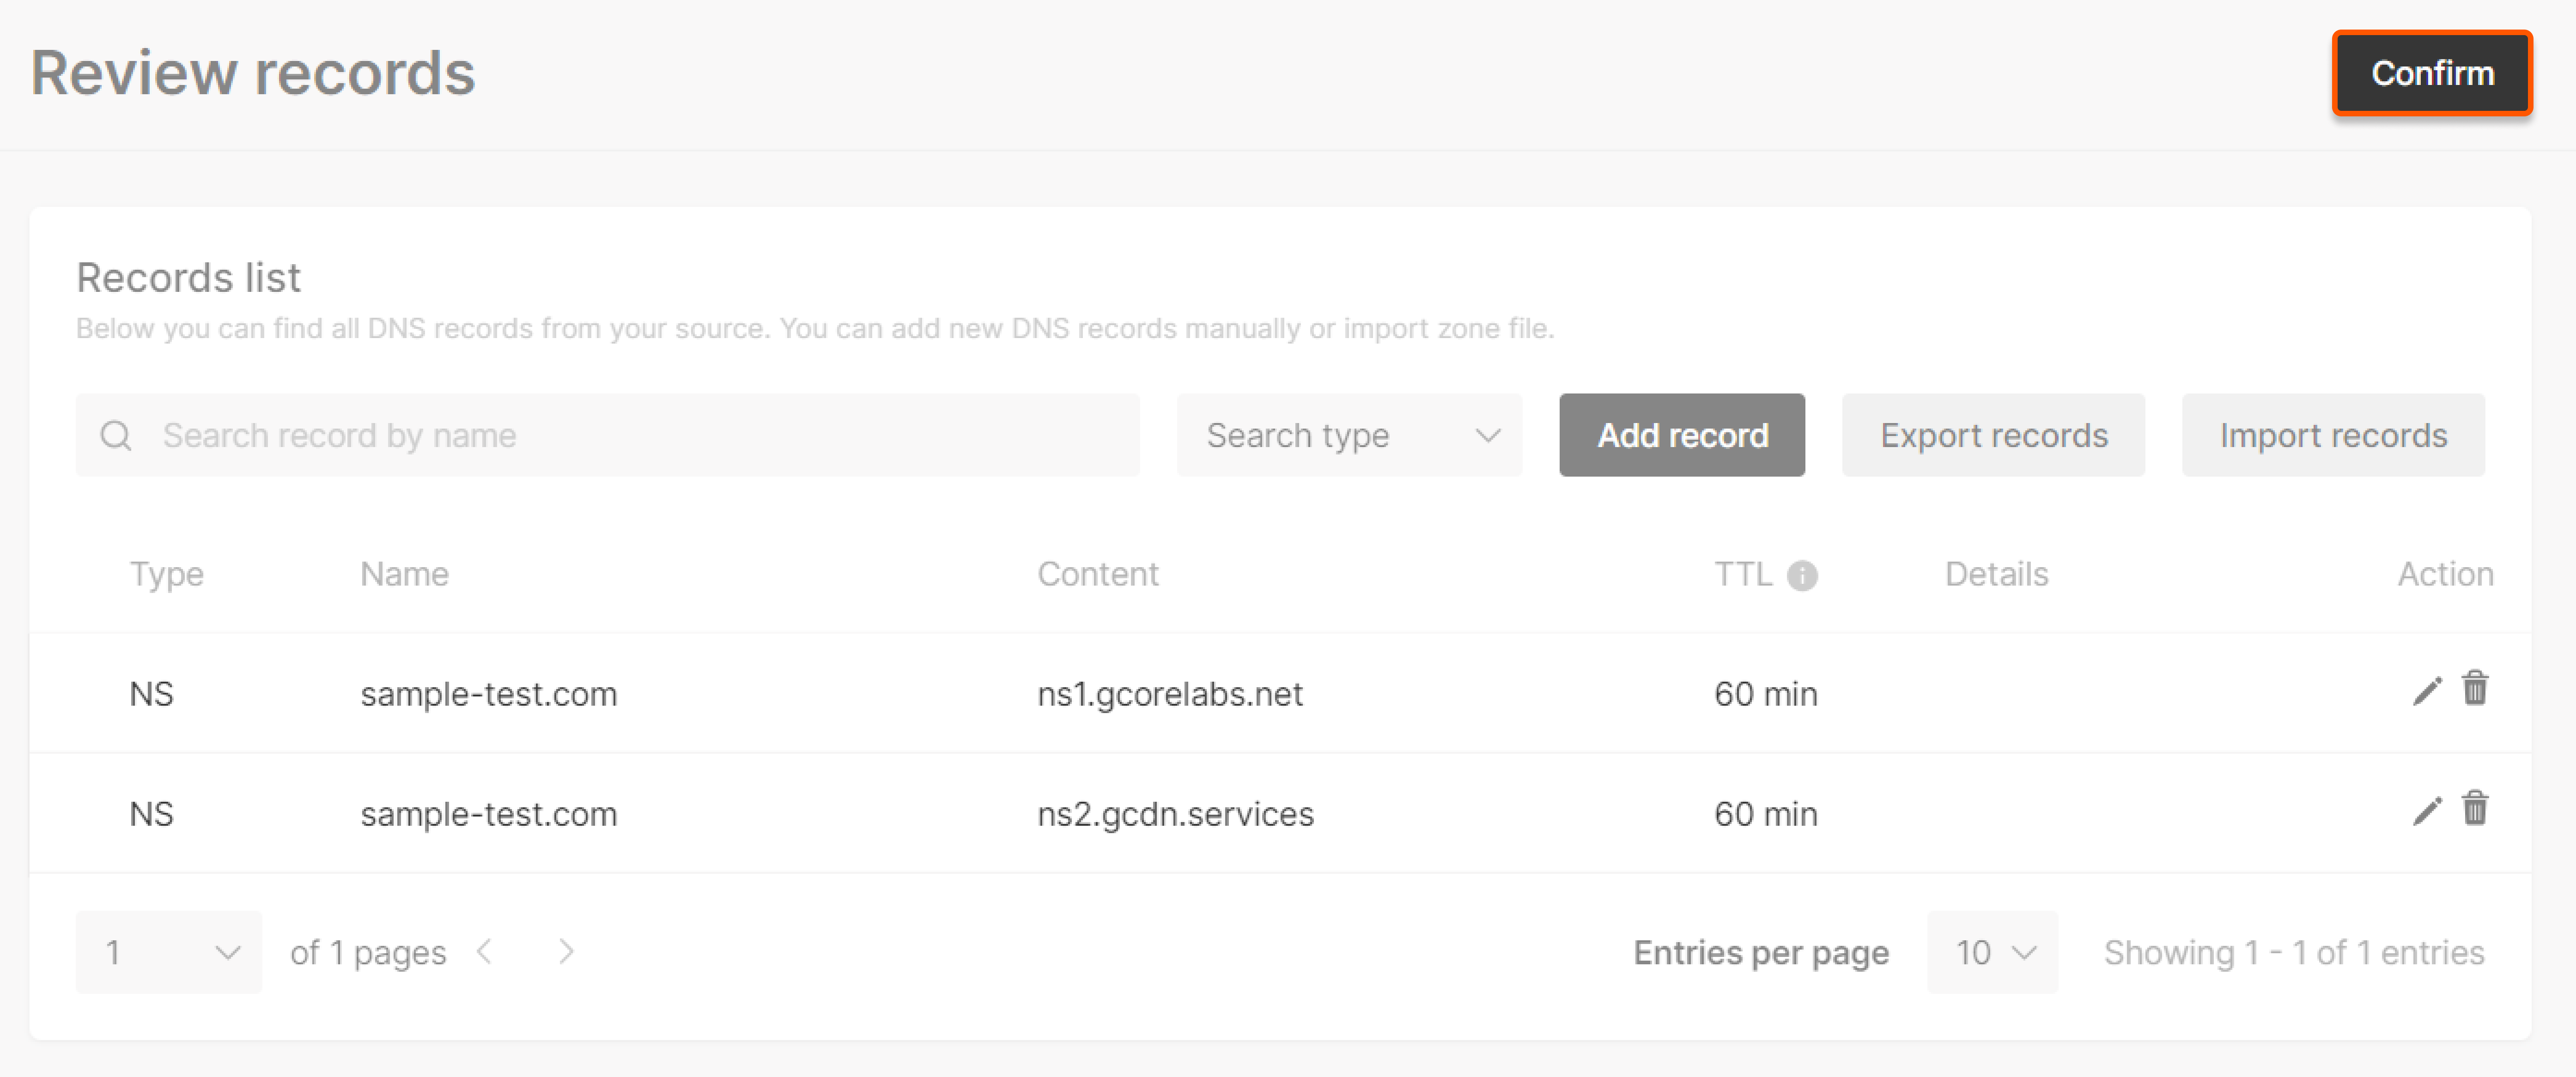
4. The new page will display all previously created records; you can edit or delete them. Once everything's correct, click Confirm.
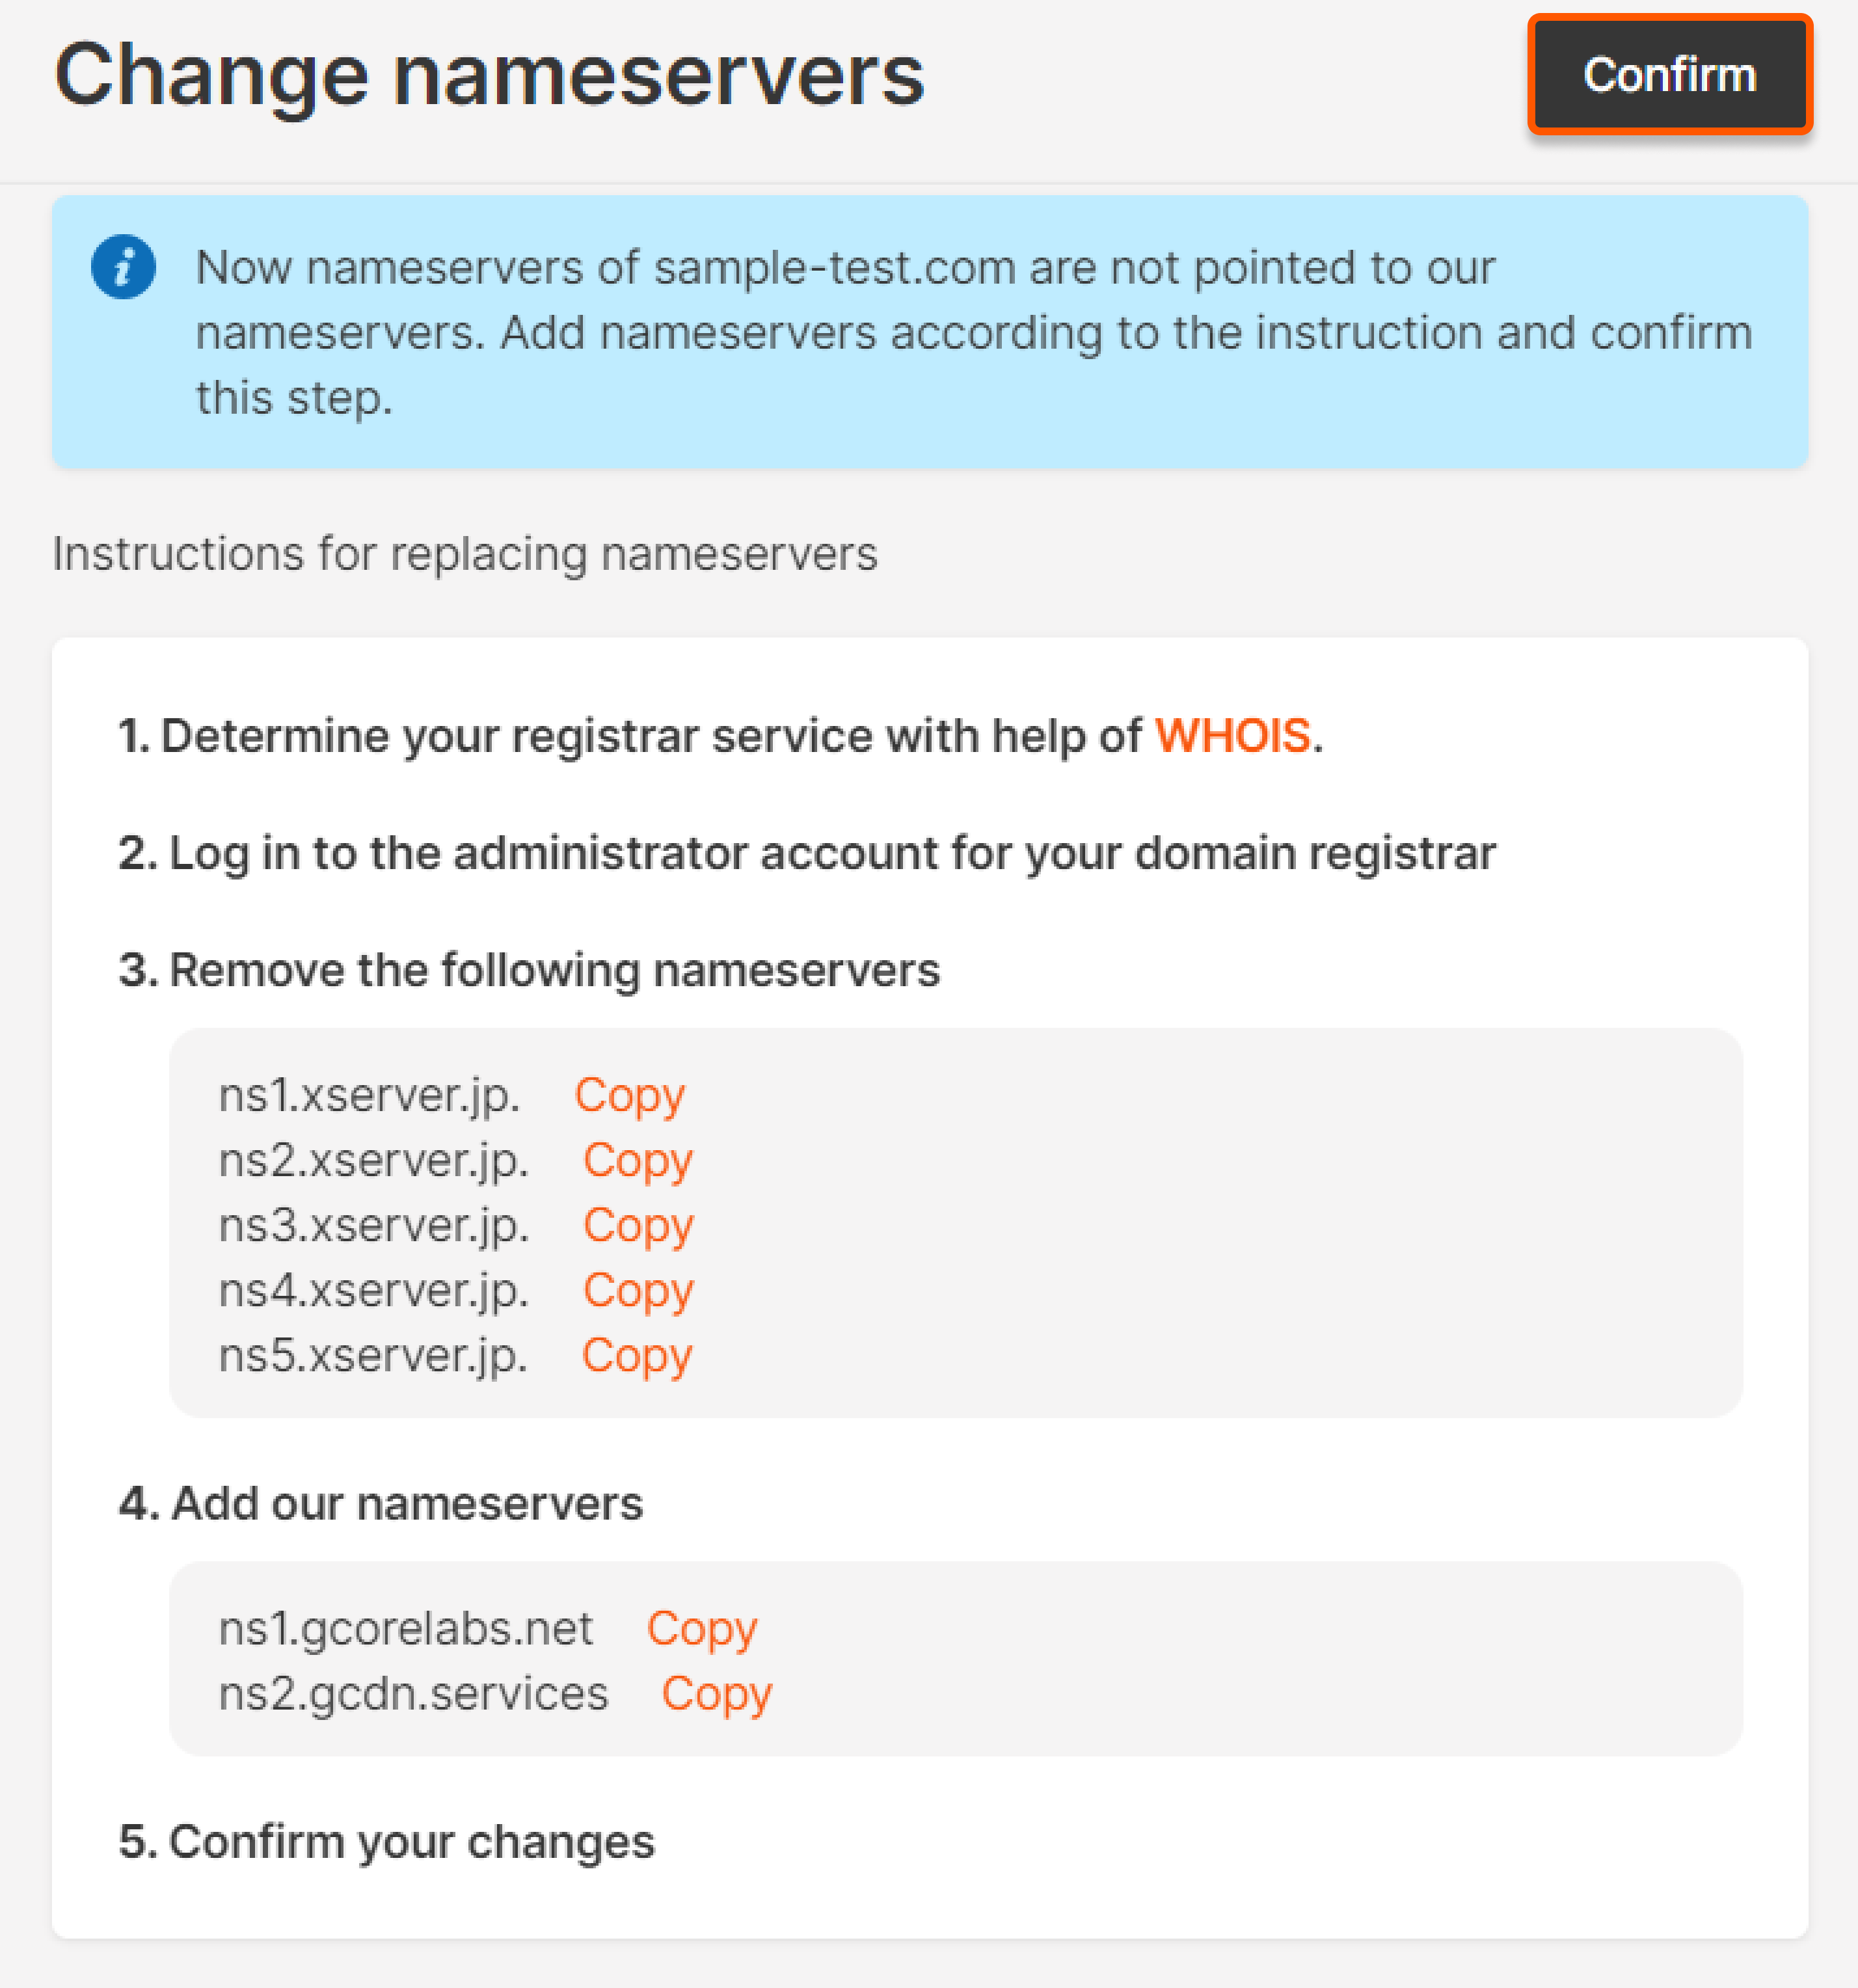
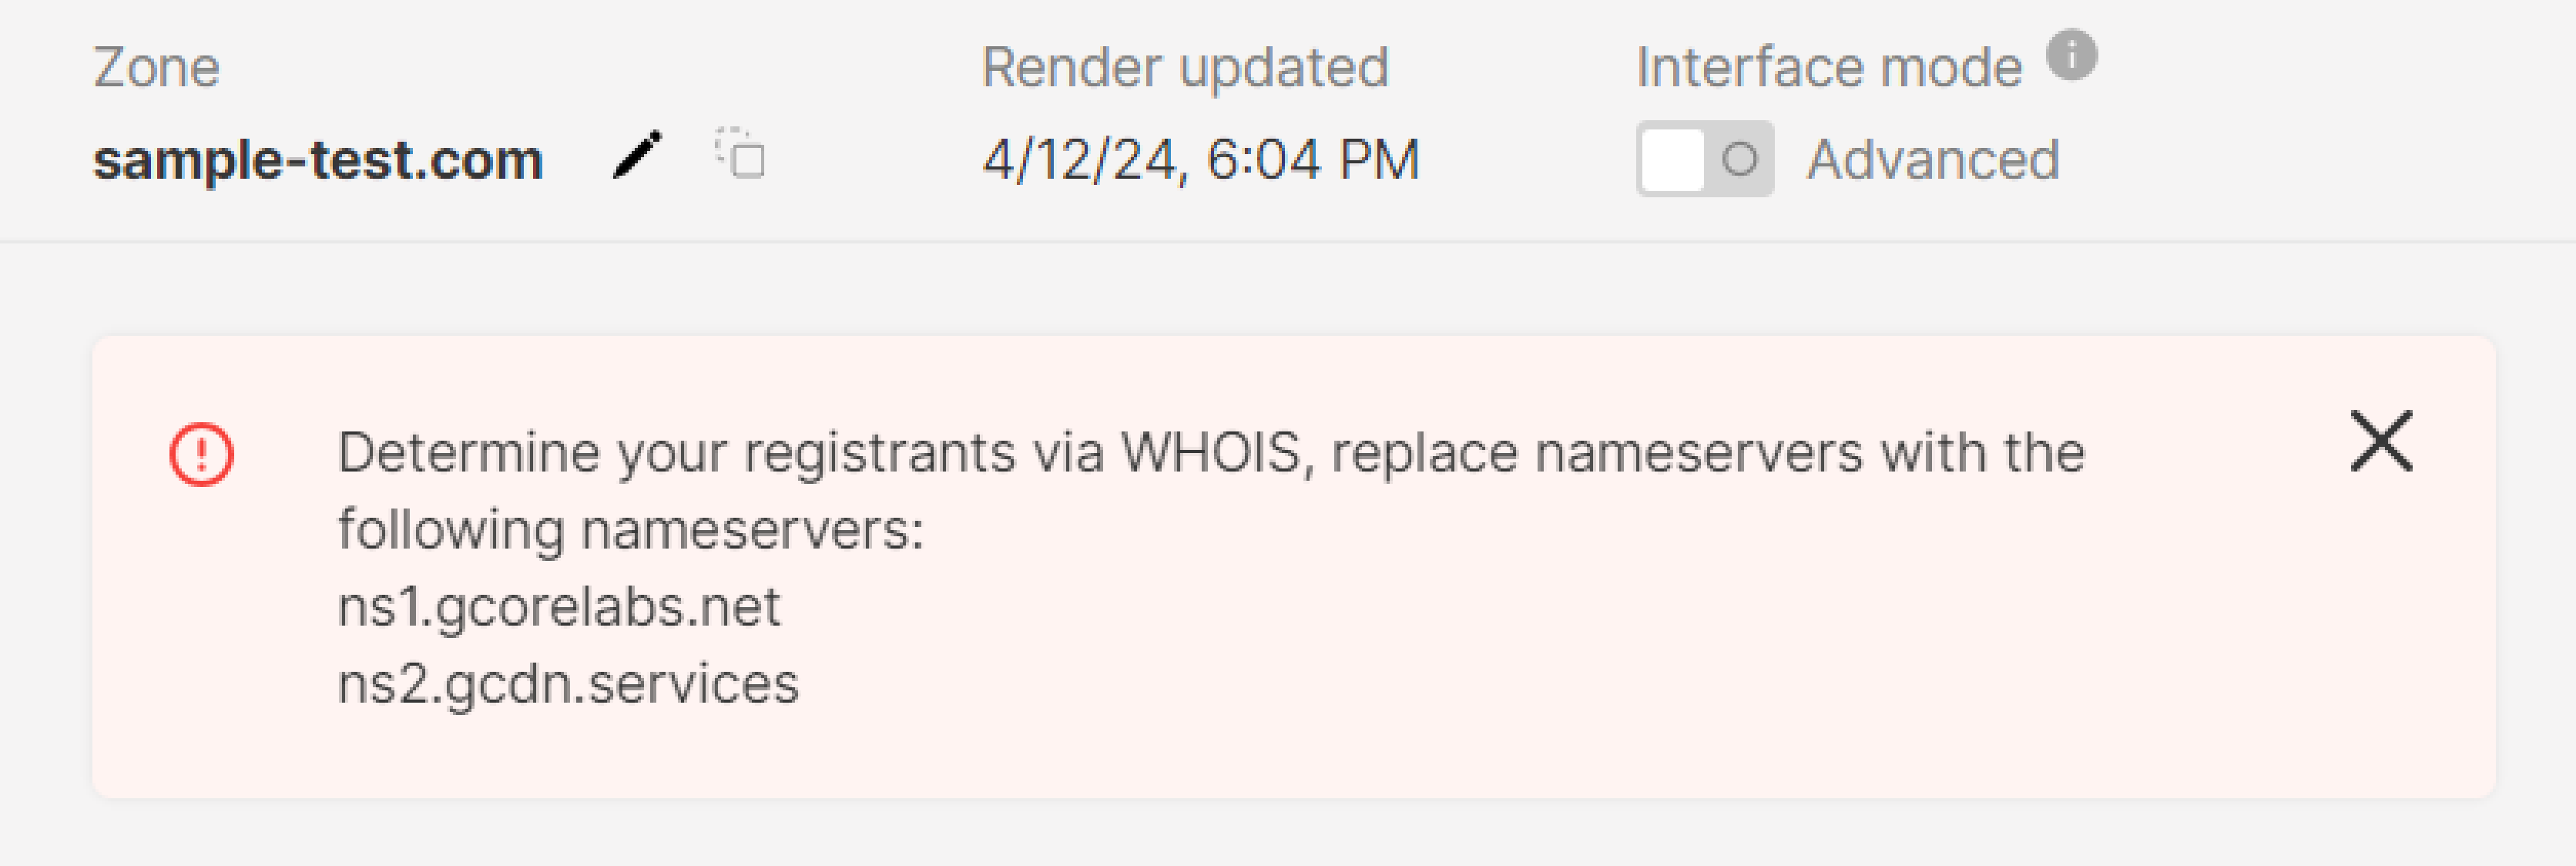
5. Go to the site where you manage your domain records (this may be your DNS provider's interface or other DNS hosting) and change your domain's current NS records to CDB values: ns1.gcorelabs.net and ns2.gcdn.services. On the DNS zone creation page, click Confirm.
That's it! Now, you can add records and manage the DNS zone in the CDB Technical Web Portal.
Warning
Please be aware of the NS records change notification. It may remain active for up to 24 hours after changing nameservers. This duration is necessary in order to update the DNS cache.
Manage DNS zones
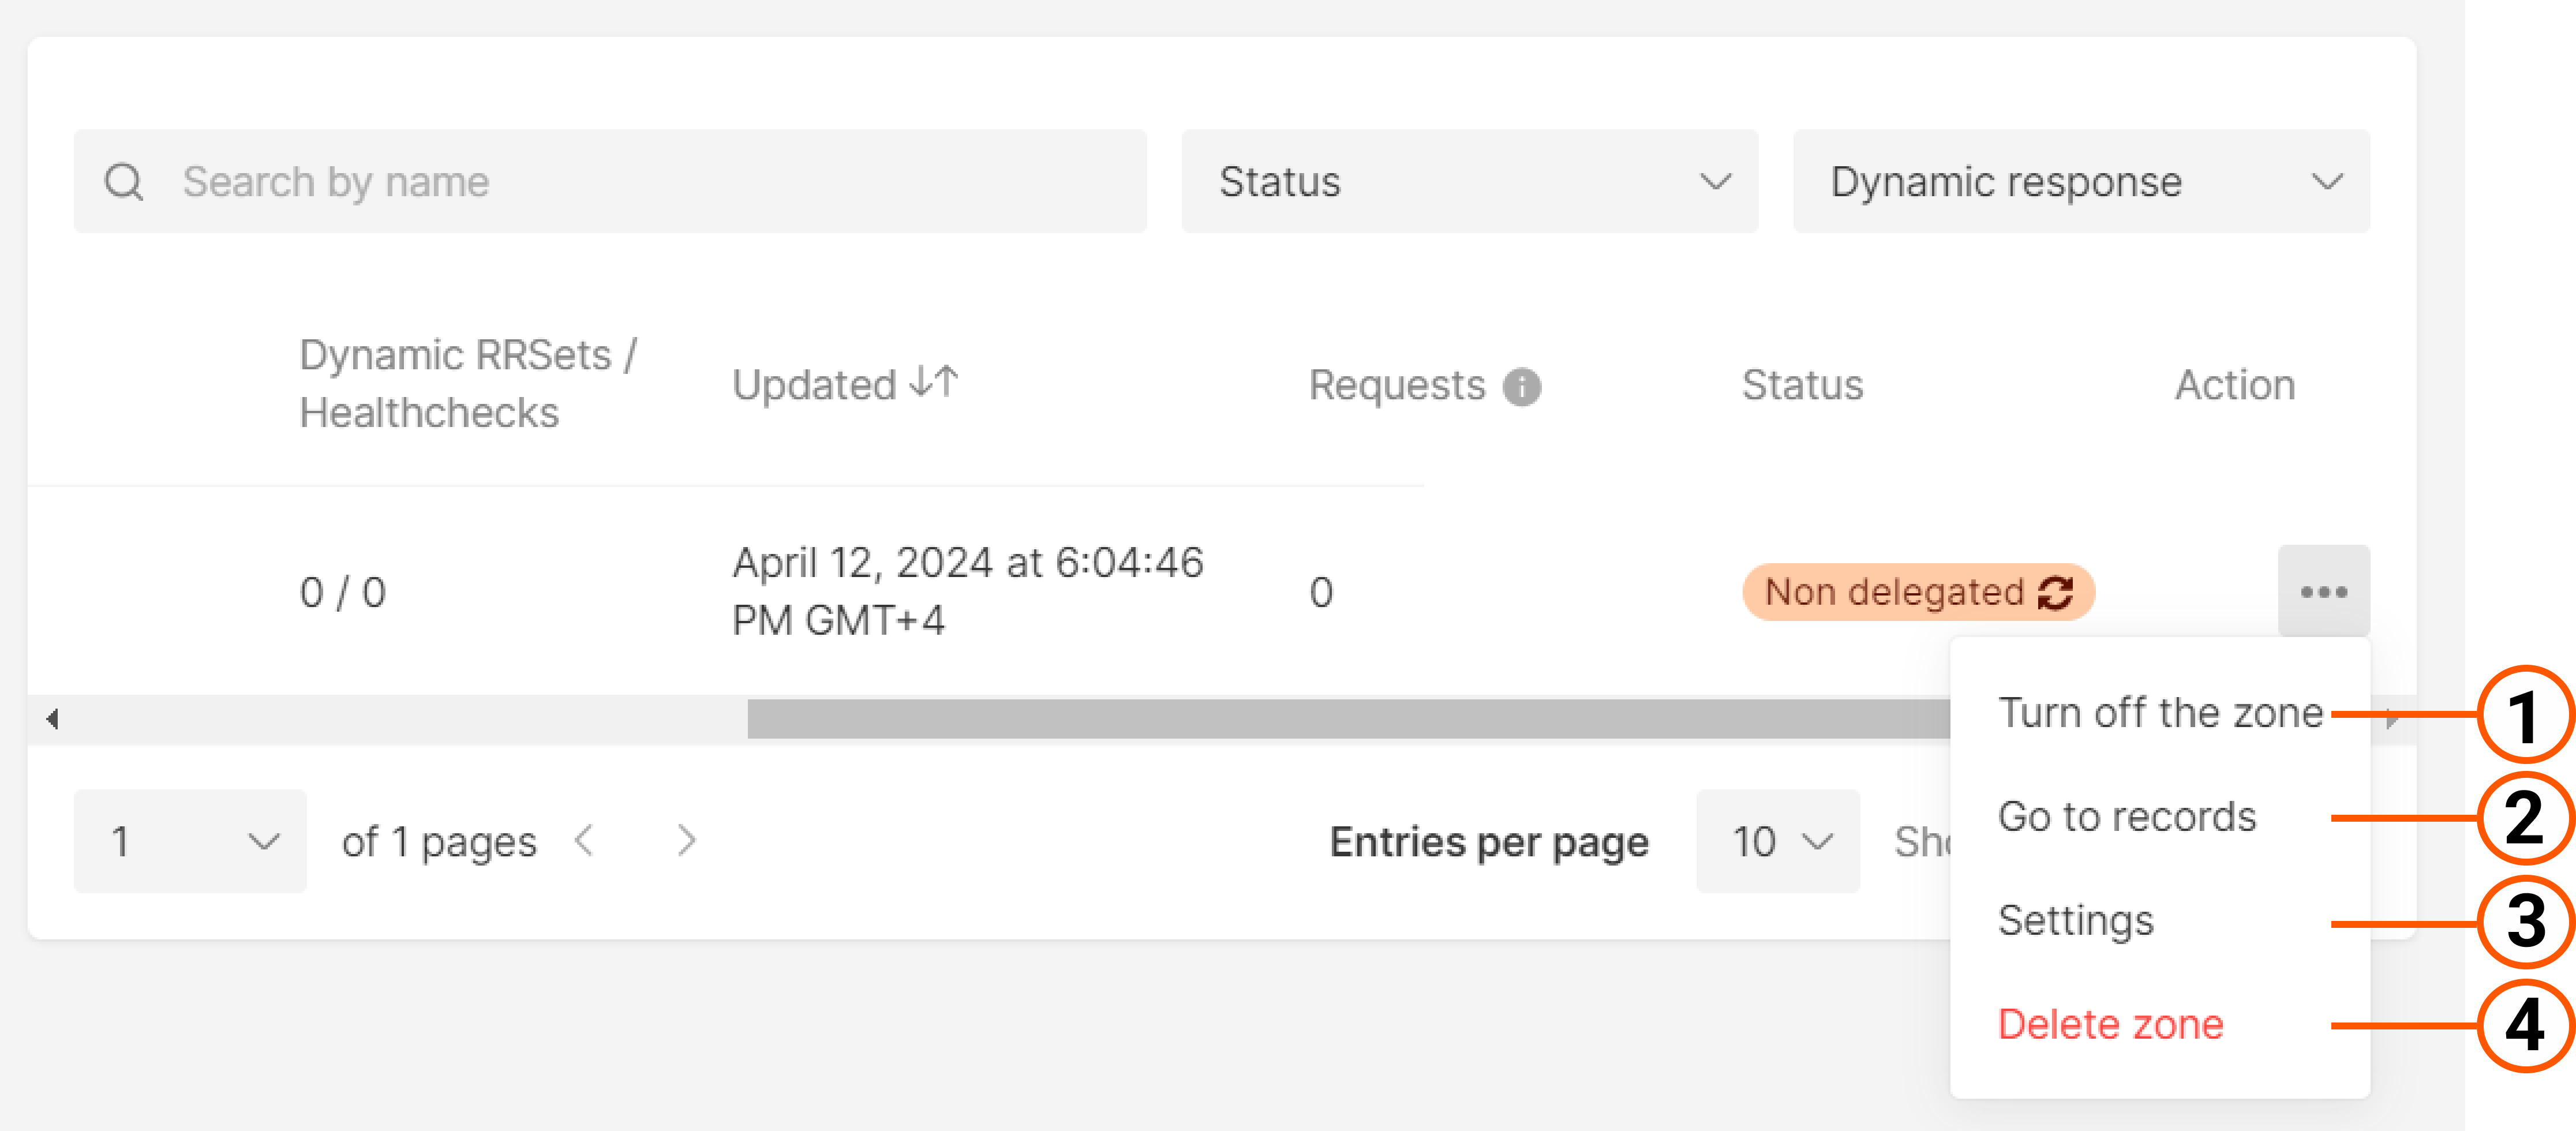
You can manage a DNS zone in the All zones section. In the row of the desired zone, click the three-dot icon and select the required action:
- Turn off the zone. Disable a zone. It will continue to be displayed, but the records added in your Customer Portal will not be active.
- Go to records. Create, edit, and delete records.
- Settings. Edit the TTL of the records in the zone.
- Delete zone. Delete zones.