Configure WAAP for a new domain
Web Application and API Protection (WAAP) is a single SaaS tool that combines all aspects of website security and traffic management, including Layer 7 DDoS protection, and web application security.
You can add a domain to WAAP protection in two ways:
- From the WAAP Domains page: Navigate to WAAP > Domains and click Create Domain. WAAP is pre-enabled on the CDN resource creation form. This is the quickest path to get a domain protected.
- From CDN settings: Create a CDN resource first and enable WAAP in the resource settings. Use this approach if you already have an existing CDN resource or need more control over CDN configuration before enabling WAAP.
After the domain is added, the remaining steps — verifying traffic in Monitoring mode, allowing admin IPs, and enabling Protection mode — apply to both paths.
Tip
After you enable WAAP, all traffic will be diverted to our network, and it may cause a temporary disruption for your users. We recommend setting up CDB WAAP during a low-traffic period to minimize the impact.
Step 1. Add a domain for WAAP protection
To protect your web application and APIs with CDB WAAP, add a domain by selecting one of the following options.
Info
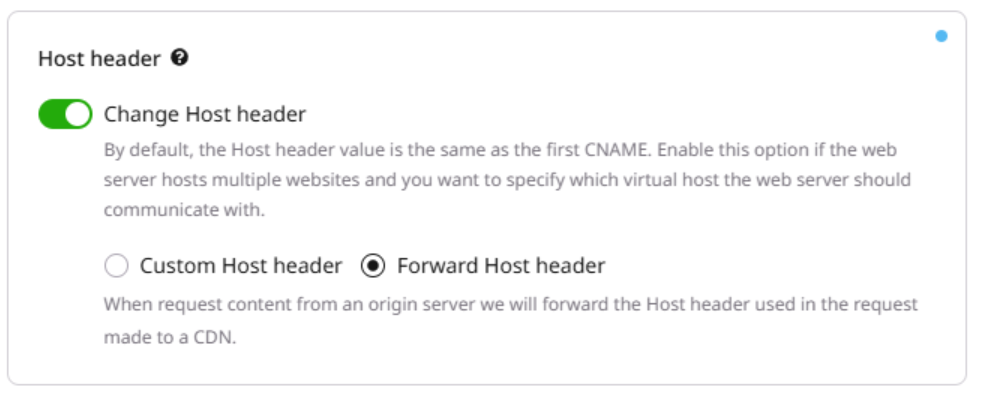
When configuring a resource, you need to update your domain's DNS records so they point to our network. This is necessary to allow all traffic to pass through WAAP.
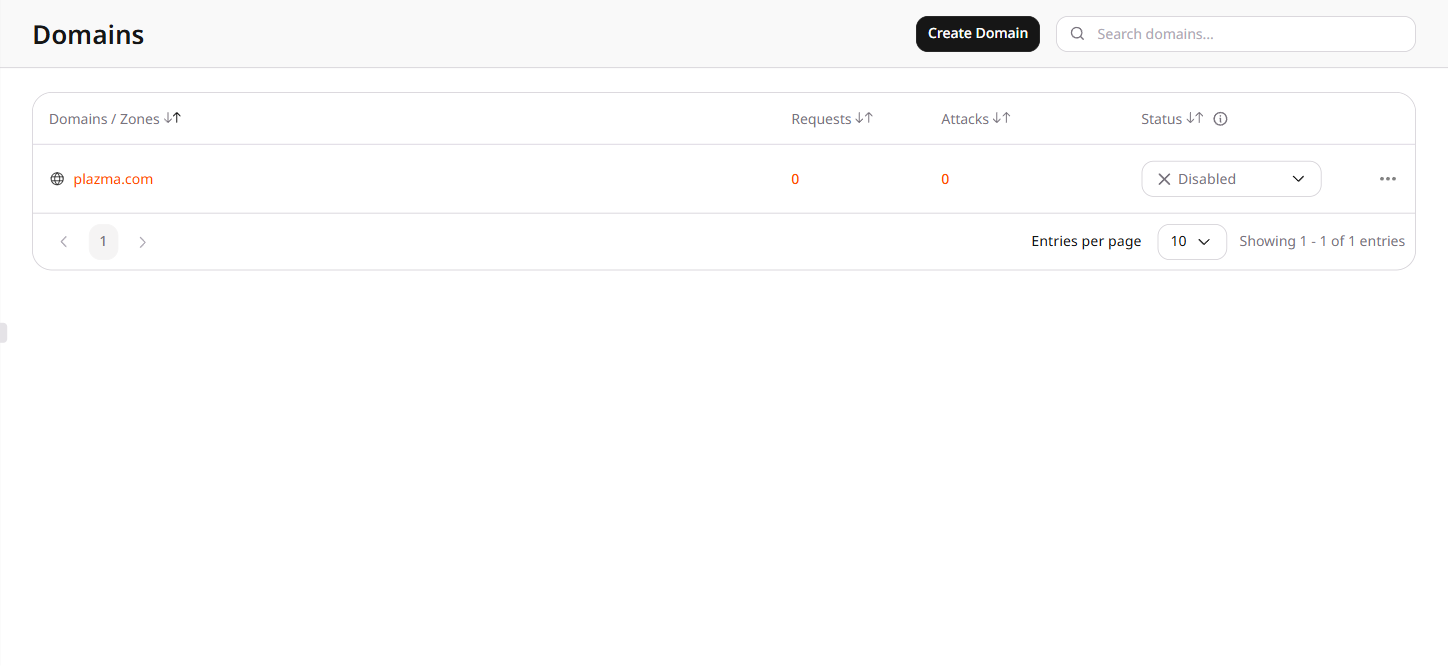
- In the CDB Technical Web Portal, navigate to WAAP > Domains.
- Click Create Domain.
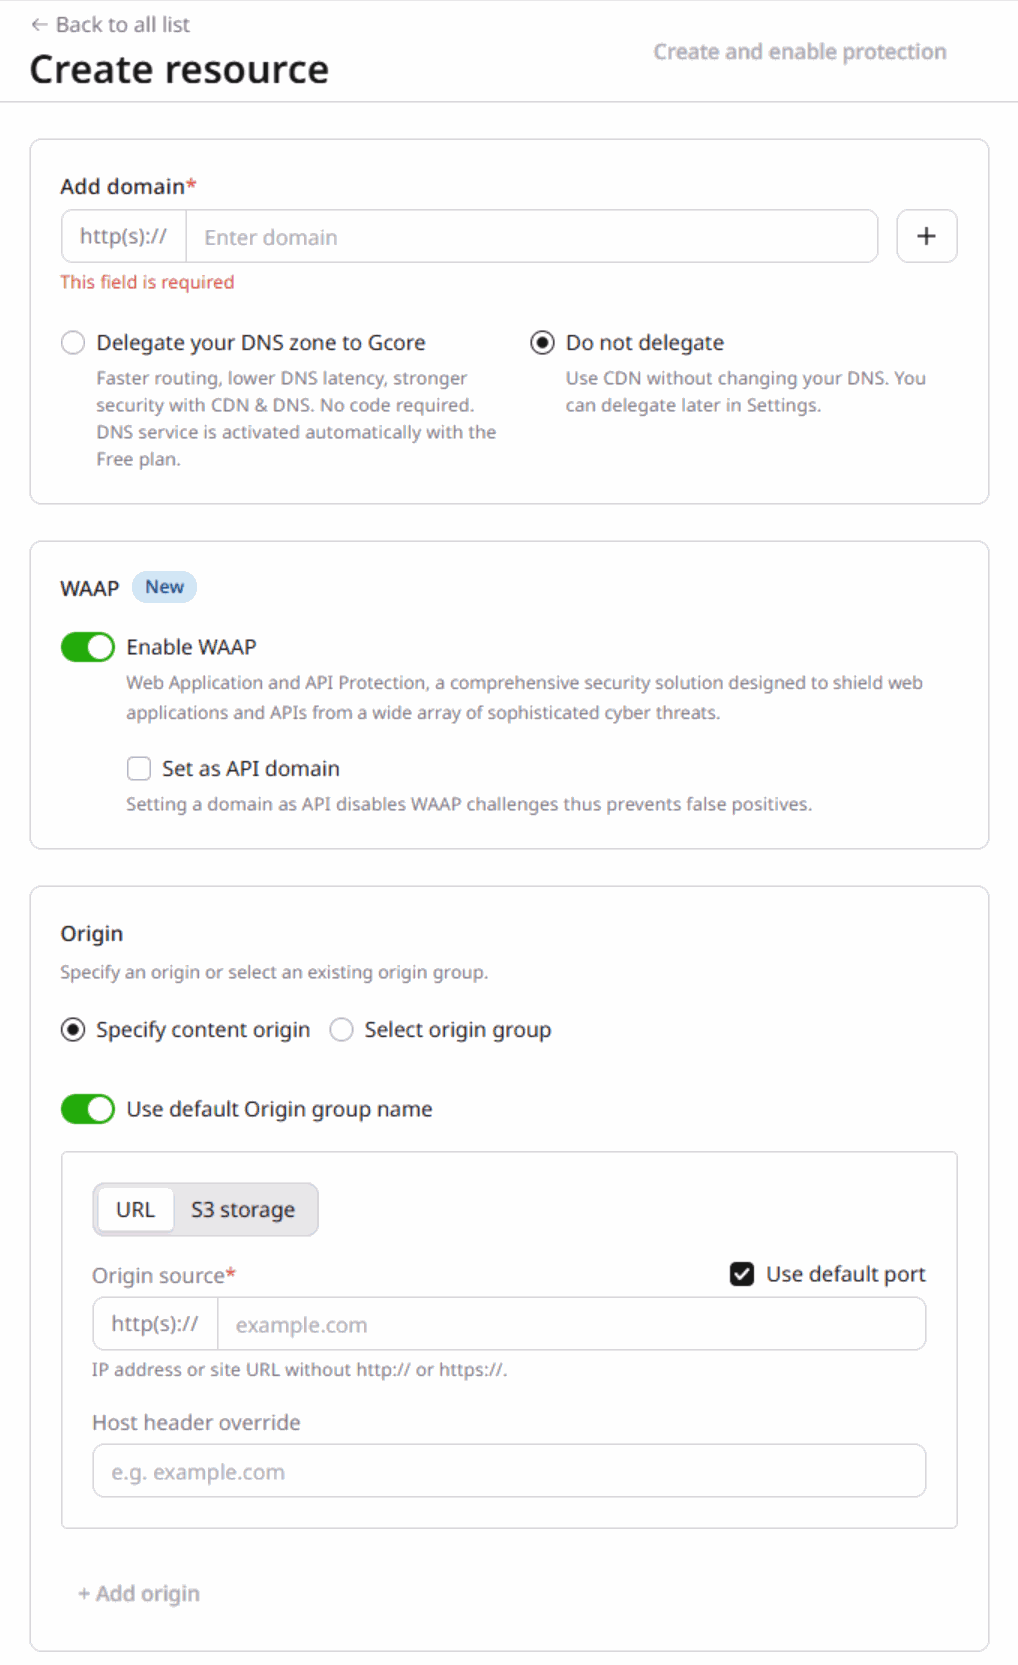
- In the Add domain field, enter your domain name. For example,
waap.example.com. - Select a DNS delegation option:
- Delegate your DNS zone to us: Routes DNS through CDB for lower latency and stronger security. No additional DNS changes needed after the CNAME step.
- Do not delegate: Use CDN without changing your DNS provider. You can delegate later in resource settings.
- In the Origin section, configure your content origin:
- Select Specify content origin to enter your origin server details.
- In the Origin source field, enter your origin server IP address or domain name.
- Keep Use default port selected to use port 80, or deselect it to specify a custom port.
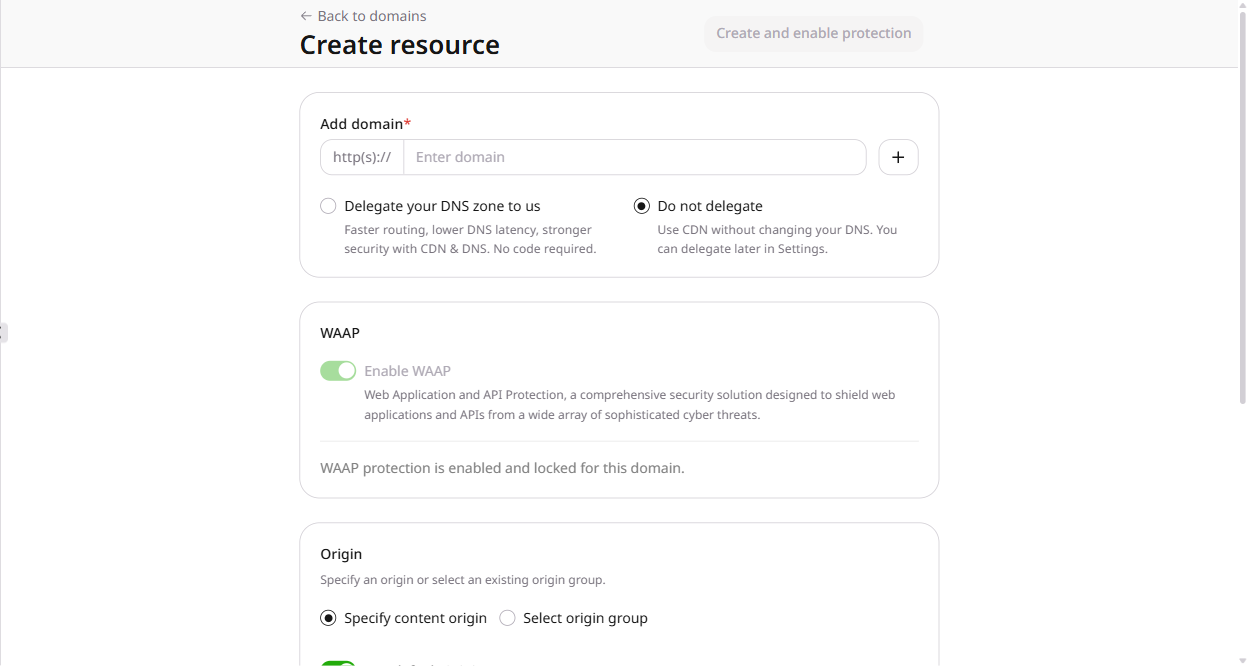
- Click Create and enable protection to create the CDN resource with WAAP already enabled.
- After the resource is created, copy the generated CNAME and add it to your DNS configuration at your DNS provider.
WAAP is enabled automatically — skip to Step 3 to verify traffic behavior.
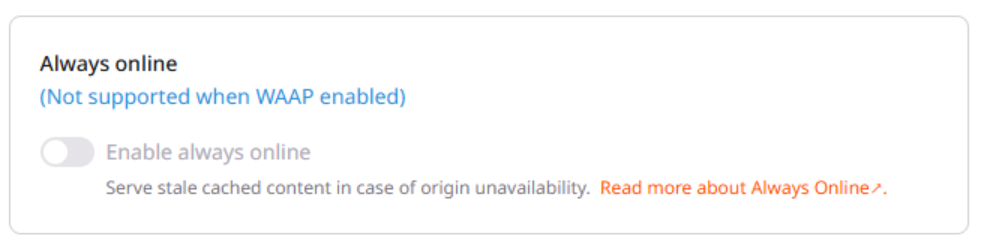
Step 2. Enable WAAP in CDN resource settings
If you added the domain using the WAAP Domains page or enabled the WAAP toggle during CDN resource creation, skip to Step 3. If you created a CDN resource without enabling WAAP, enable WAAP protection now. Refer to the Protect CDN resources with CDB WAAP guide for detailed instructions.
Step 3. Use WAAP in Monitoring mode
After you enable WAAP, it will be automatically set to the Monitoring mode. In this mode, all incoming requests are inspected, but no action is taken. It's best to use Monitoring mode for several days before enabling the Protection mode to make sure that all security settings work correctly.
Completing this step is important because it allows you to analyze requests and test the WAAP behavior before you fully activate it.
Warning
In Monitoring mode, all traffic is allowed to your domain, regardless of configured security rules and policy groups. This mode is only recommended for testing WAAP settings.
Step 4. View your domain traffic
While keeping WAAP in Monitoring mode, you can view all logged requests and check the corresponding actions that WAAP will take once you put it in Protection mode.
Use the Events page to detect common traffic patterns and understand if the current configuration requires any adjustments.
- In the CDB Technical Web Portal, navigate to WAAP > Events.
- Use the Domain filter to select your domain.
- Review the requests and the actions WAAP has taken.
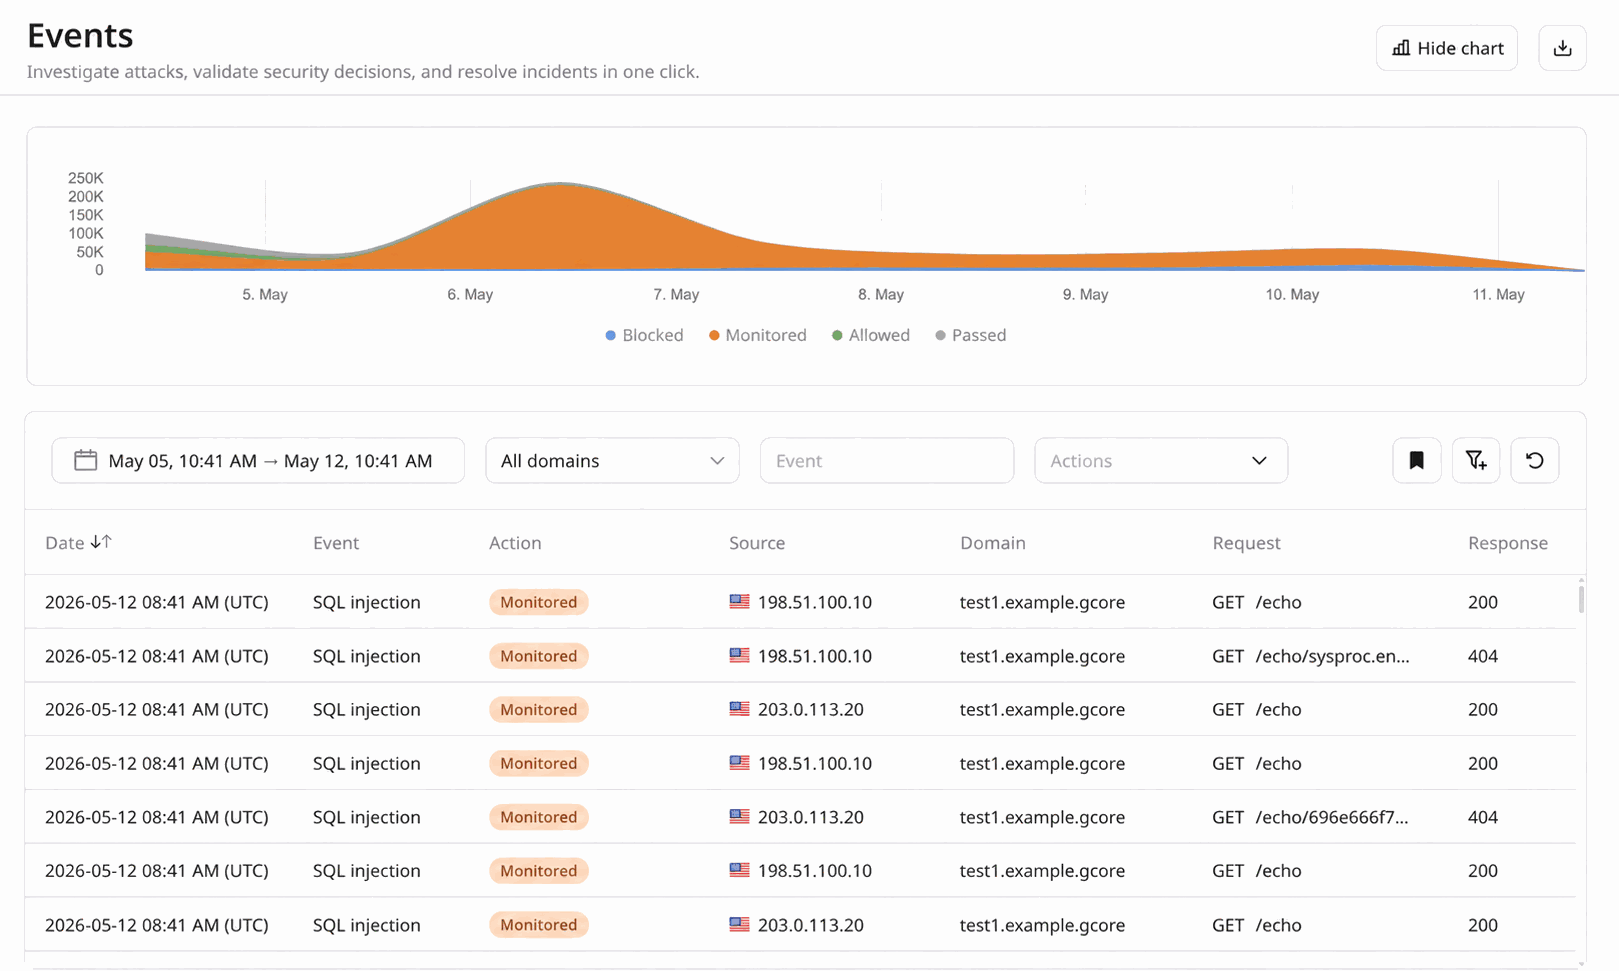
You can also use additional filters to get more granular information about your traffic. For more details about the available filters check the section Why filtering matters.
To view more information about an event, click on its row.
Step 5. Test your WAAP configuration
To achieve the desired WAAP behavior, we recommend that you navigate through your website as both a user and administrator.
Navigating the website will generate entries in the Requests table. You can use this information to determine if you need to create Firewall rules or custom WAAP rules for some requests and let them access your website's content.
Specifically, review requests that relate to:
- Your origin IP: IP address assigned to your device.
- Your office IP: IP address assigned to your device within your office's network.
- Your workstation IP: IP address assigned to a workstation or specific computer in a network.
If you notice that WAAP will block such requests in Protection mode, you need to update your settings to prevent such a situation. You can find detailed instructions on how to update your settings in the following step.
Check out the allow and block IP addresses guide for more information.
Step 6. Allow admins, bots, and CMS
Before WAAP is in Protection mode, you need to ensure that critical IP addresses, content management systems (CMS), and known bots are allowed to make successful requests.
Check the WAAP policy groups for a full list of security policies and their detailed overview.
Allow admin IP addresses
If your domain doesn't use a CMS, we highly recommend allowlisting the site administrator's IP address:
- In the CDB Technical Web Portal, navigate to WAAP > Firewall.
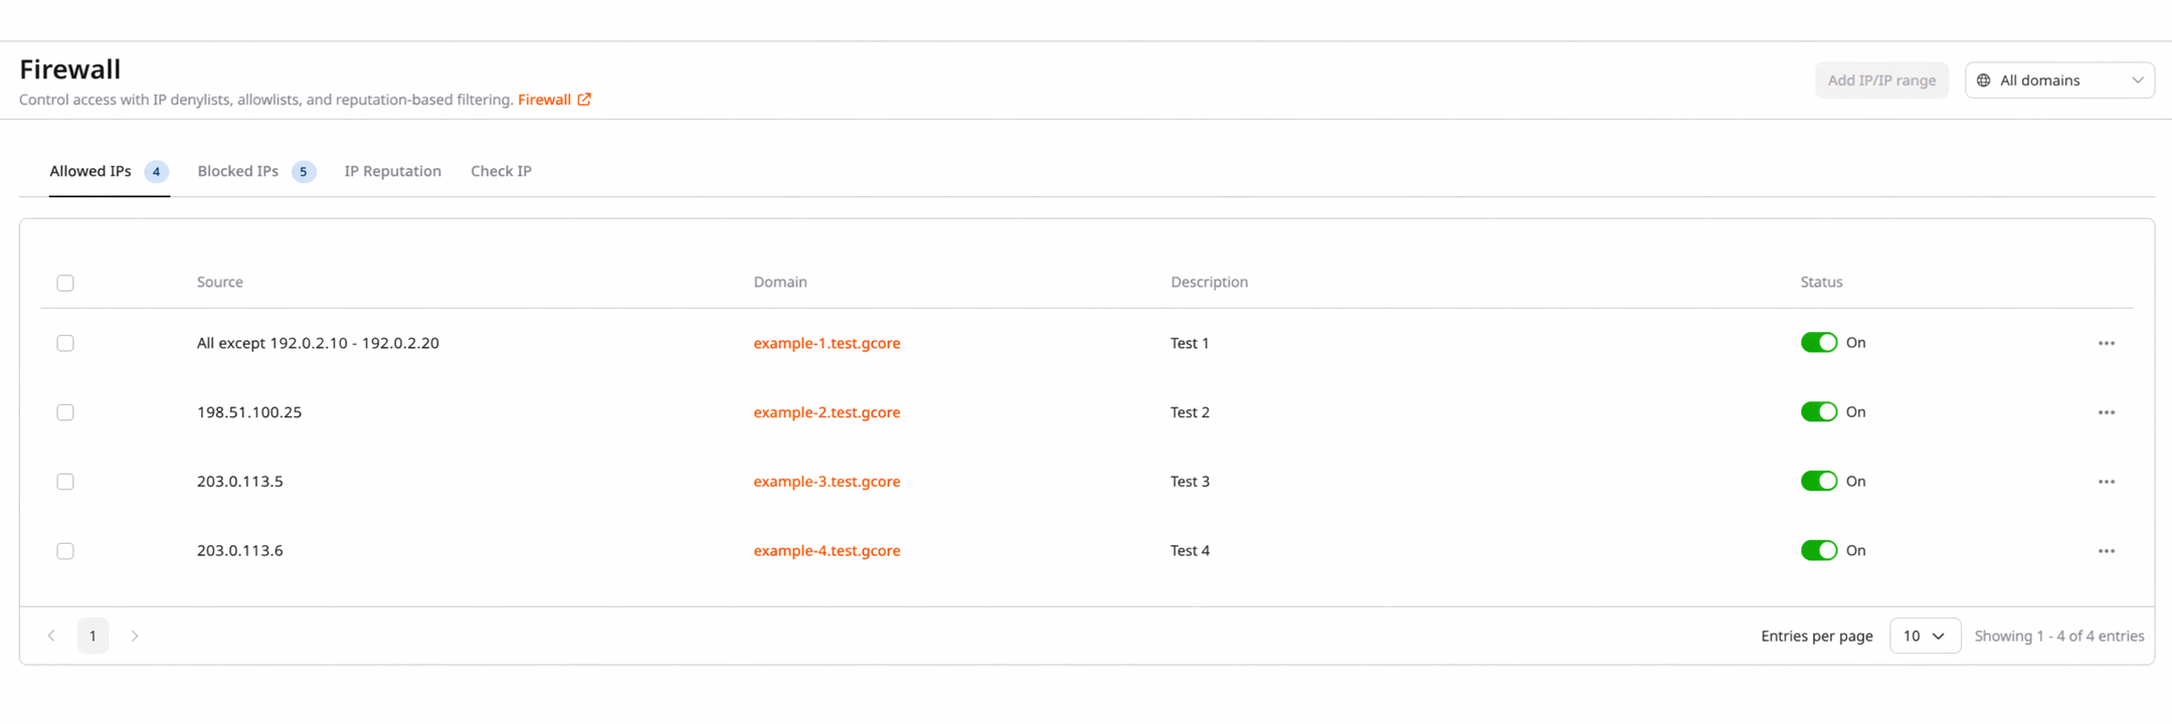
- Select the needed domain from the domain dropdown.
- In the Allowed IPs tab, click Add IP/IP range.
- Enter any admin user's public IP address.
- Click Save.
Repeat these steps if needed.
Allow CMS
If you use content management systems, such as WordPress, allow traffic for CMS admins:
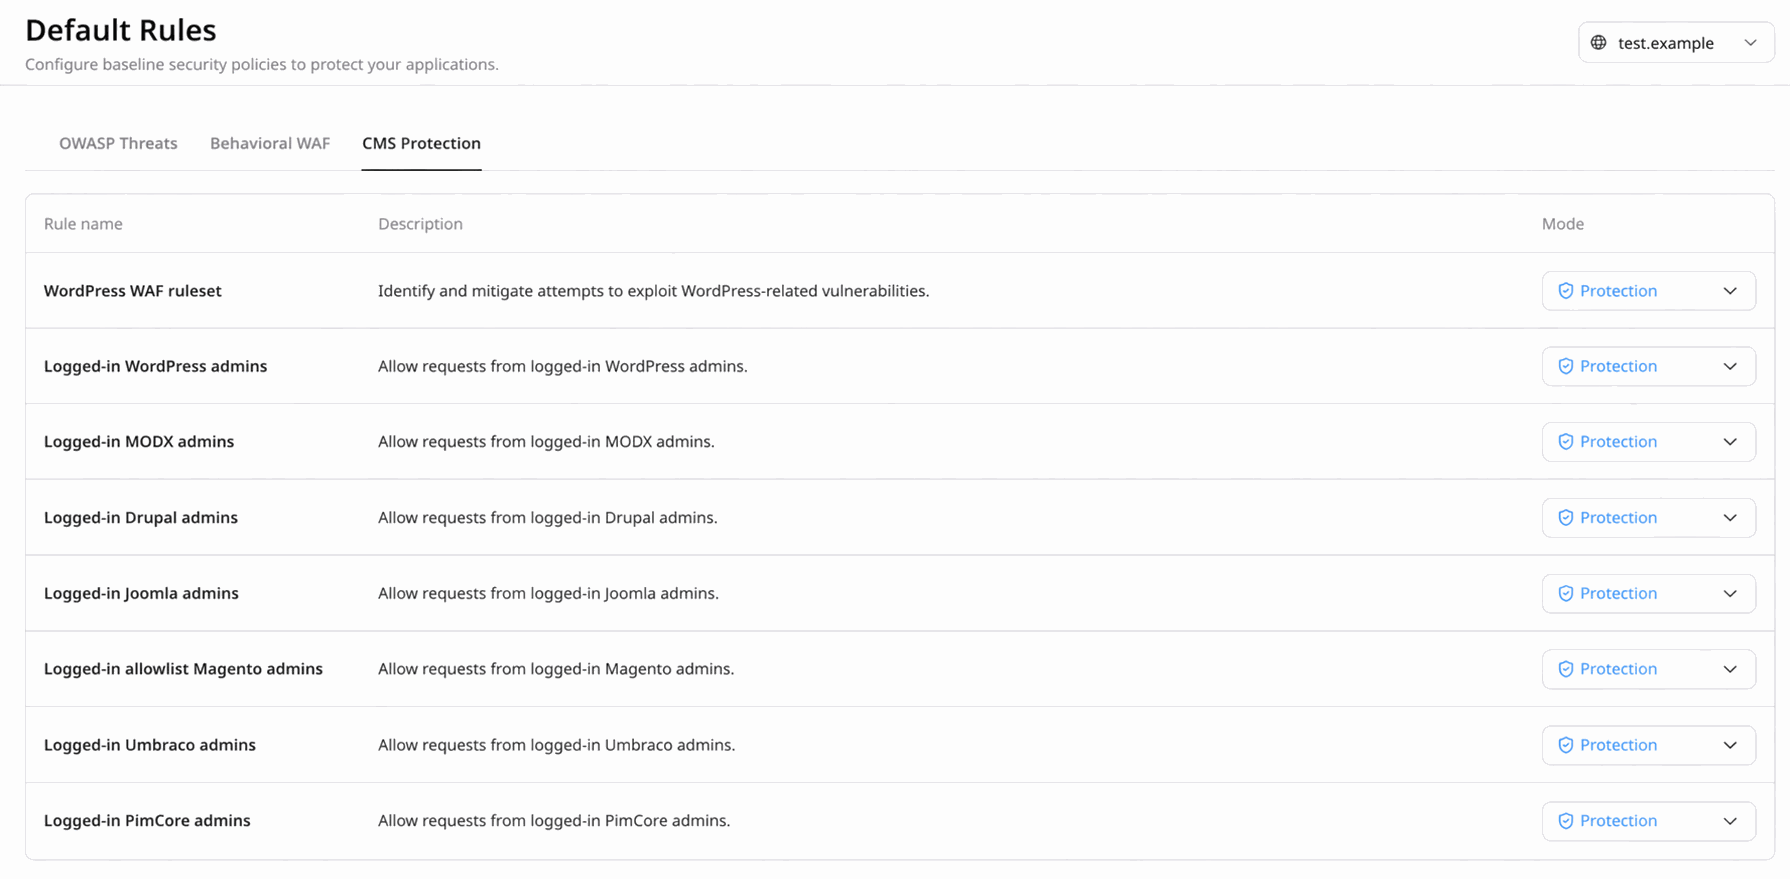
- In the CDB Technical Web Portal, navigate to WAAP > Default Rules.
- Select the needed domain from the domain dropdown.
- Click the CMS Protection tab.
- Find the desired content management system and change its mode to Allow by clicking on the mode dropdown next to it.
Tip
The WordPress WAF ruleset policy is enabled by default.
Allow Known Bots
Follow these steps to allow crawlers, scanners, monitoring bots, and similar tools to access your website:
- In the CDB Technical Web Portal, navigate to WAAP > Bot Management.
- Select the needed domain from the domain dropdown.
- Click the Known Bots tab and enable the desired bot by changing its mode to Allow.
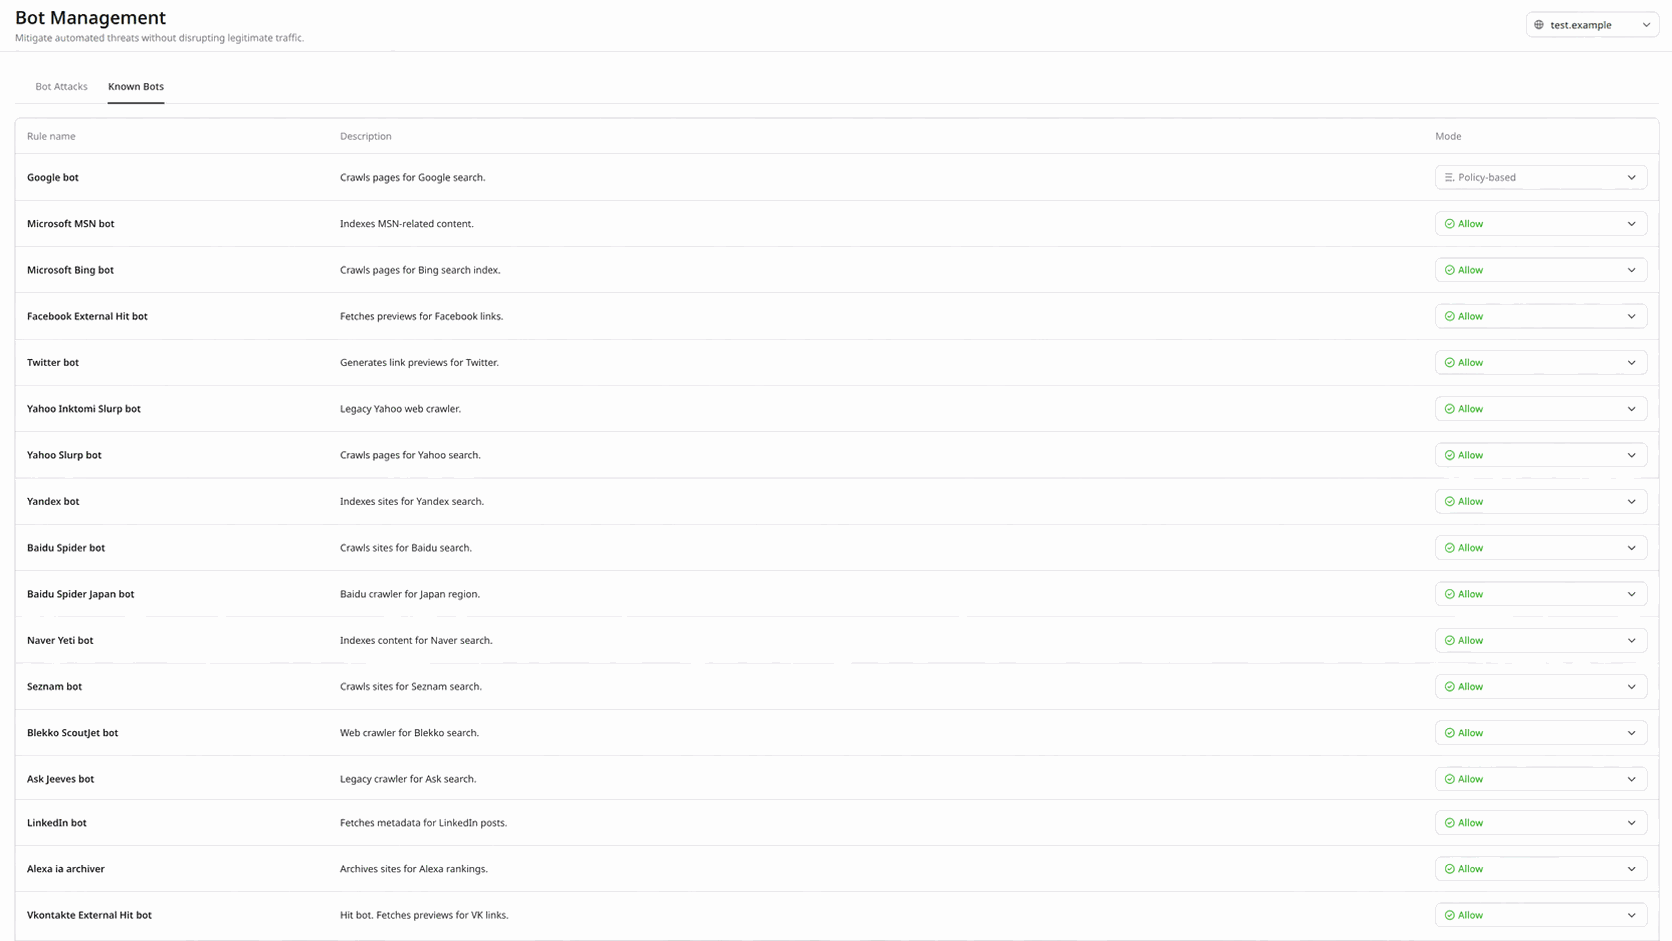
The Known Bots list allows several trusted bots by default, which is why we recommend reviewing this list before enabling Protection mode.
Step 7. Configure your APIs
If you plan to serve JSON requests through an API on your domain, you can disable the JavaScript injection and CAPTCHA functionalities for specified API endpoints.
You can manually add endpoints to API base path or configure the API Discovery feature to automatically detect and protect your APIs.
Step 8. Enable Protection mode
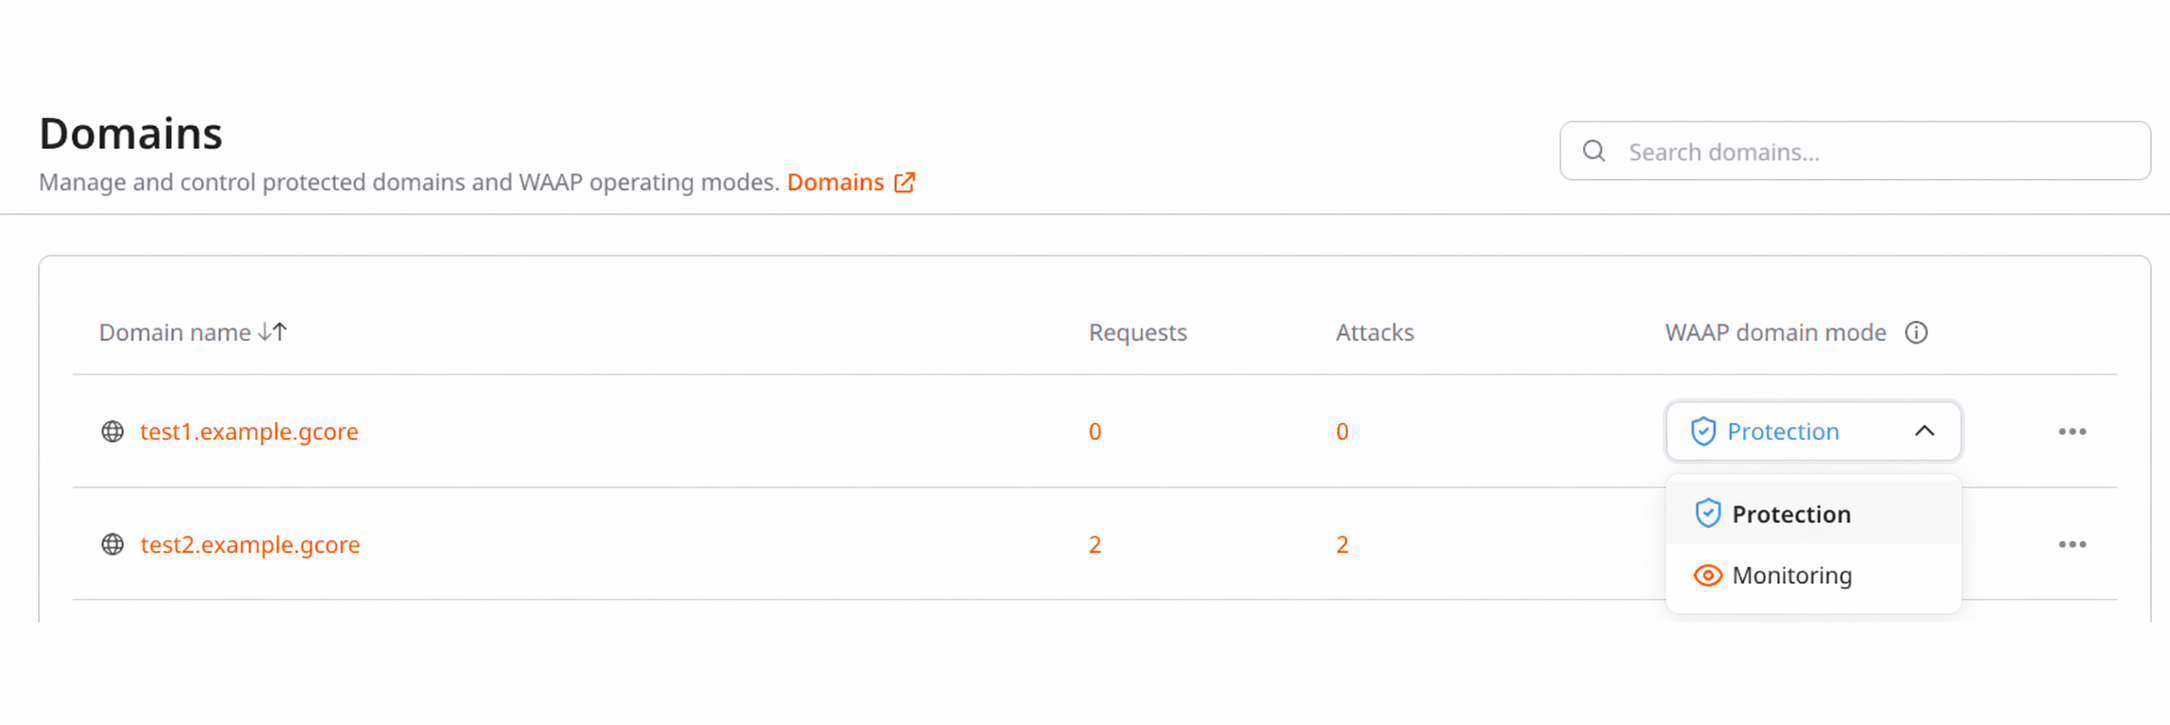
- In the CDB Technical Web Portal, navigate to WAAP > Domains.
- Find the needed domain in the list.
- In the WAAP domain mode column, click the mode dropdown and select Protection. WAAP will begin to inspect and act upon incoming requests.
Step 9. Block non-CDB traffic
After successful DNS propagation and verifying that domain-based traffic is being handled by WAAP, ensure that all requests to your domain are routed through CDB servers. This is necessary to prevent unauthorized traffic from bypassing WAAP and directly reaching your domain.
- Add our CDN servers to the allowlist.
- Block other incoming requests that don't match our allowlist.