Edge Storage
Edge Storage stores key-value data that Edgecompute applications can read at runtime.
Each store is a named container for key-value pairs. After creating a store, link it to a Edgecompute application before the application can access its data — linking instructions are in Managing applications.
Data is replicated across Gcore's edge network, so reads are served from a local copy at the edge location handling each request.
Create a store
Creating a store uses a two-step wizard. The first step sets the store name; the second step adds key-value pairs before saving.
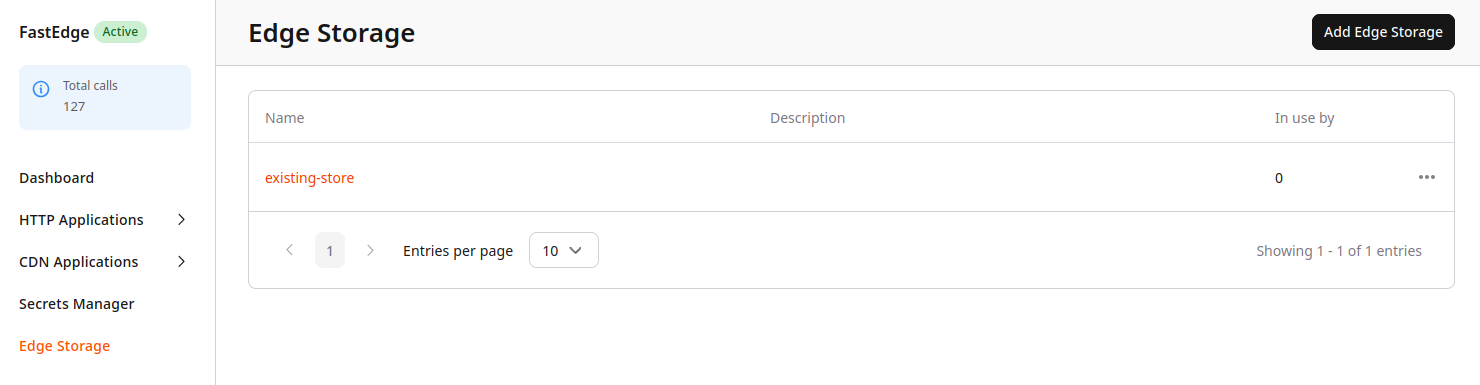
To start, open the CDB Technical Web Portal, navigate to Edgecompute, and select Edge Storage in the sidebar.
- Click Add Edge Storage in the top-right corner.
-
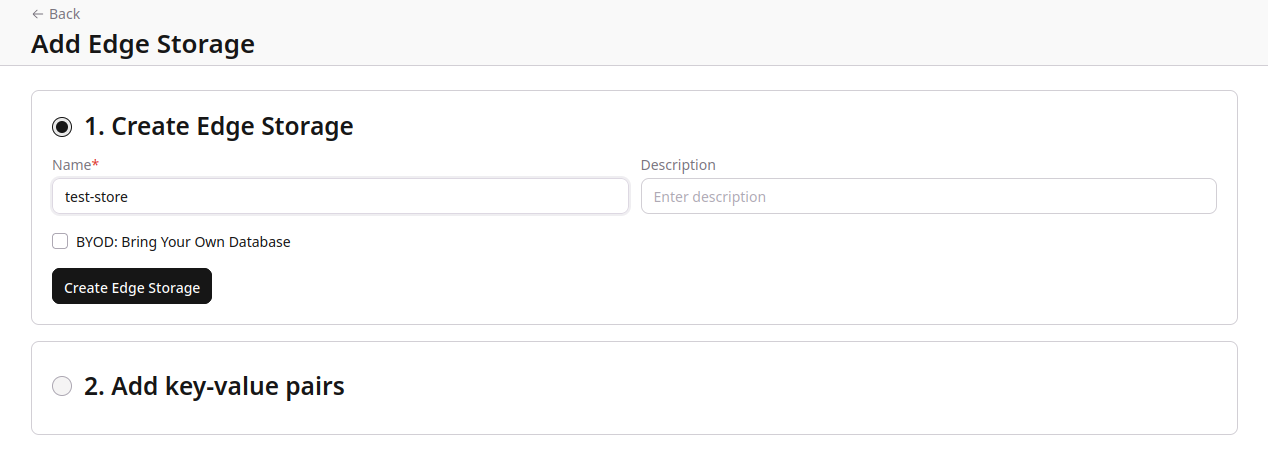
Enter a name and optionally a description.
-
Click Create Edge Storage to proceed to the second step.
-
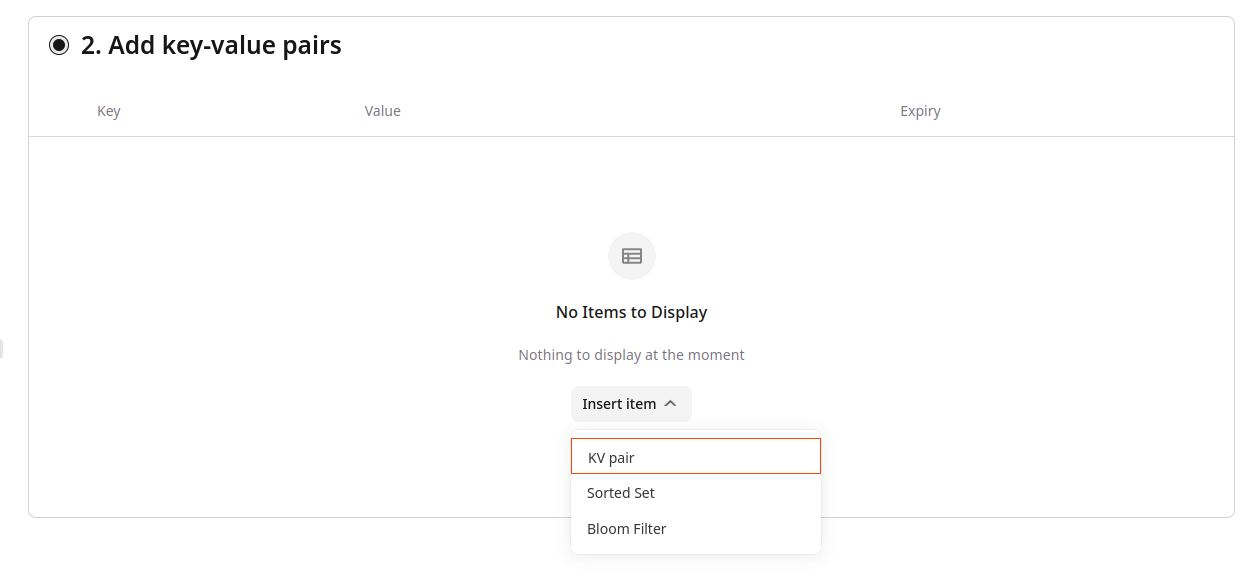
In the second step, add key-value pairs using the Insert item button, or skip this step — pairs can be added later by opening the store from the list.
-
Click Save Edge Storage.
The store appears in the Edge Storage list.
Insert key-value pairs
Key-value pairs are added through the Insert item panel inside the store view. Pairs can be added during the creation wizard (step 2) or at any time by clicking the store name in the Edge Storage list to open it.
Add a pair manually
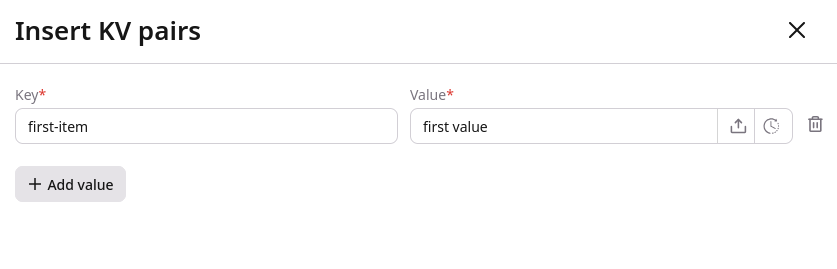
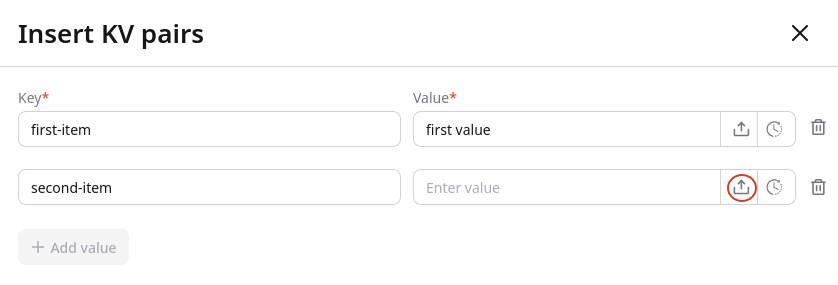
Click Insert item and select KV pair. In the panel that opens, enter the key and value. Click + Add value to add another row. Click Save to apply the changes.
Keys are limited to 256 bytes.
Upload a value from a file
To load a value from a file instead of typing it, click the upload icon in the value row. Text and binary files are supported — images, fonts, and similar assets. The maximum file size is 1 MB. After uploading, the portal displays a hash of the file content rather than the original filename.
Set an expiration date
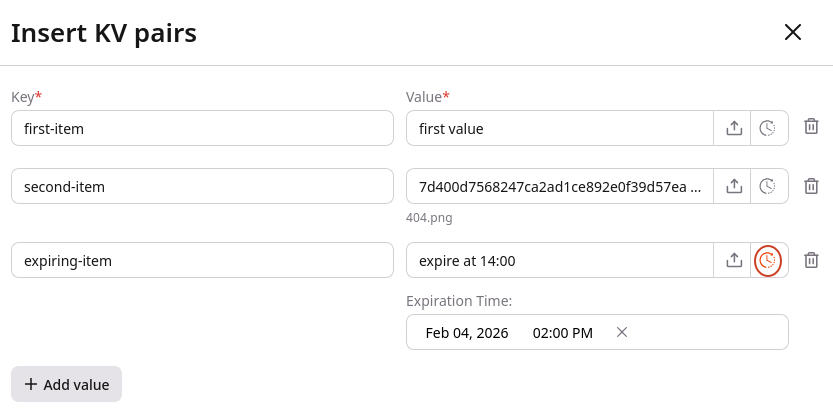
To assign an expiration to a value, click the expiry icon in the value row and select a date and time. After that point, the value stops being returned to applications. It may remain visible in the portal briefly after expiration.
Edit a key-value pair
Once pairs are in a store, individual values can be updated at any time. Clicking a store name in the Edge Storage list opens the Edit Edge Storage page where all pairs are listed. To edit a pair, click the three-dot icon next to it, select Edit, update the value or expiration date, then click Save.
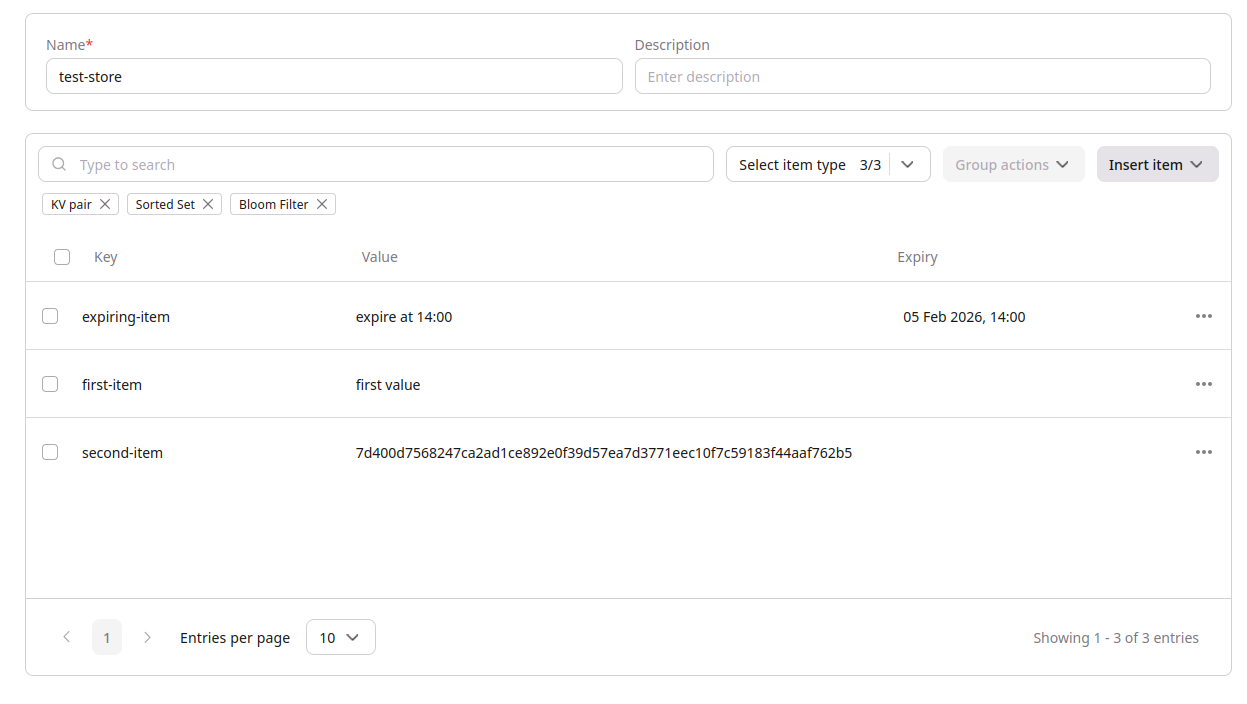
Additional pairs can be inserted from the edit view. Submitting a key that already exists in the store overwrites its current value.
Delete key-value pairs
To remove outdated or incorrect data, pairs can be deleted individually or in bulk. Open the store by clicking its name in the Edge Storage list to access both options.
To delete a single pair, click the three-dot icon next to it, select Delete, and confirm.
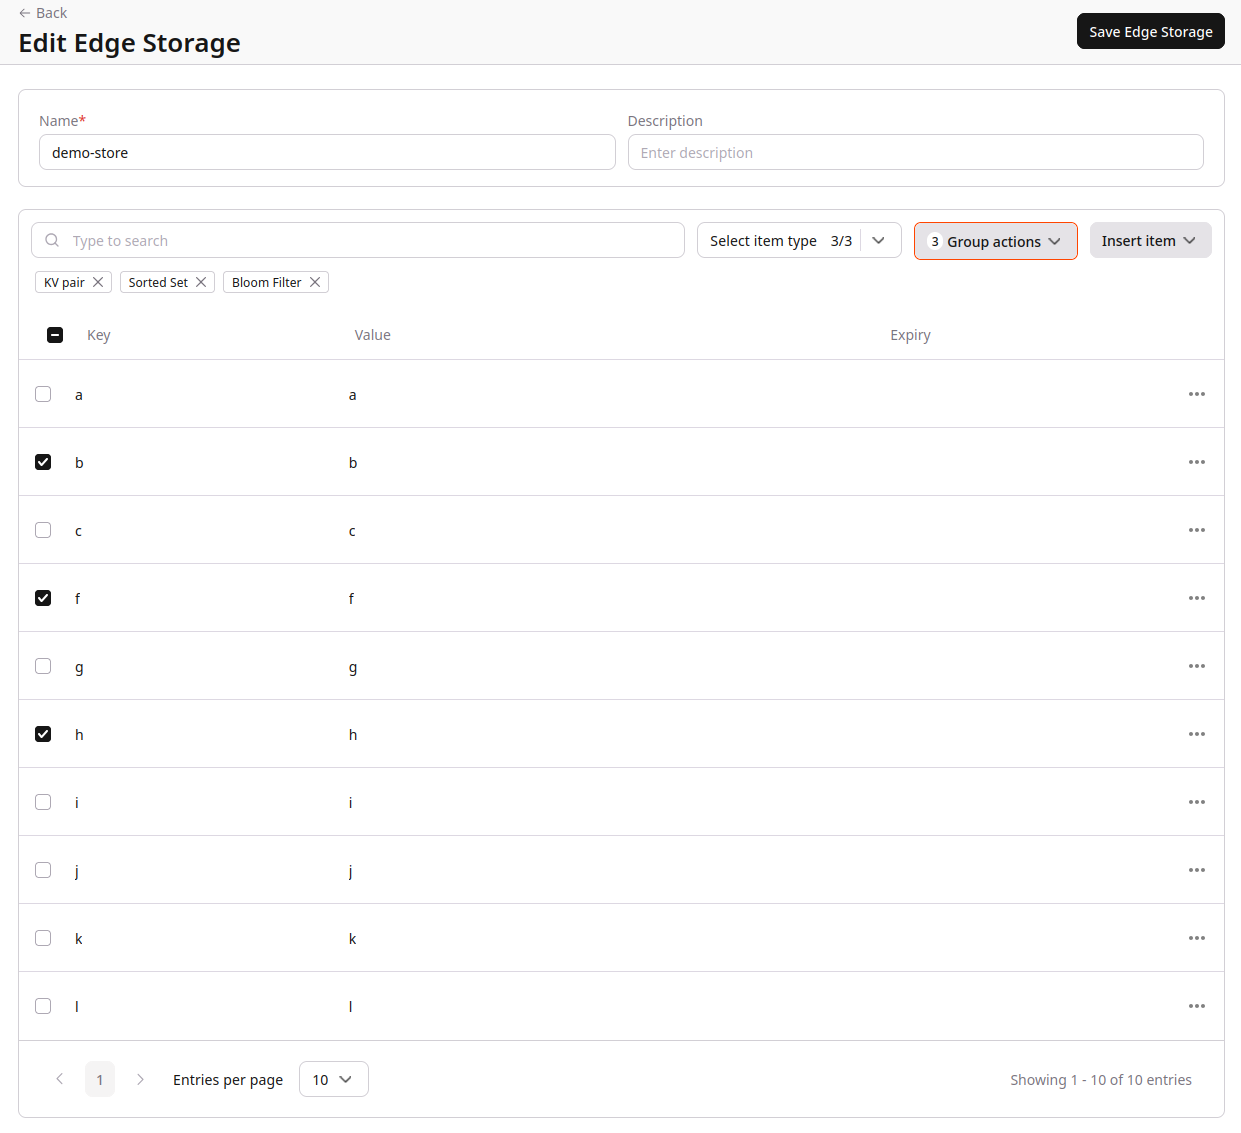
To delete multiple pairs, select the checkboxes in the first column of the table, click Group actions, and select Delete all.
BYOD: Bring Your Own Database
BYOD connects a Edgecompute store to an external key-value database instead of Gcore's hosted storage. Applications access a BYOD store through the same JavaScript SDK or Rust SDK as a regular store — no code changes required.
Any store implementing the Redis protocol is supported: Redis, Apache Kvrocks, and other Redis-compatible key-value stores.
The external store must be publicly accessible. Gcore's edge nodes connect to it over the network on each request.
Hosted Edge Storage vs BYOD
With hosted Edge Storage, data lives at every edge location globally and reads are served locally — latency is typically in the single-digit milliseconds. With BYOD, each read is a live query to the external database, so response time depends on the network distance between the edge location and the database host.
BYOD is a practical choice for development, testing, or workloads where read speed is not critical. For latency-sensitive production workloads, hosted Edge Storage is recommended.
Supported URL schemes:
redis://— standard Redis protocolrediss://— Redis protocol over TLS
URL format: redis://:password@host:port/db-index or redis://username:password@host:port/db-index
Create a BYOD store
Follow steps 1–3 from Create a store, then:
-
Select the BYOD: Bring Your Own Database checkbox. Two additional fields appear:
- URL — the connection URL for the Redis-compatible store. For example:
redis://:mypassword@redis.example.com:6379/0 - Prefix — a string prepended to every key when Edgecompute reads or writes the store. For example, with prefix
app:prod:, a read for keygreetingretrievesapp:prod:greetingfrom the external database. Use a prefix to namespace application data within a shared instance. Leave blank if no namespacing is needed.
- URL — the connection URL for the Redis-compatible store. For example:
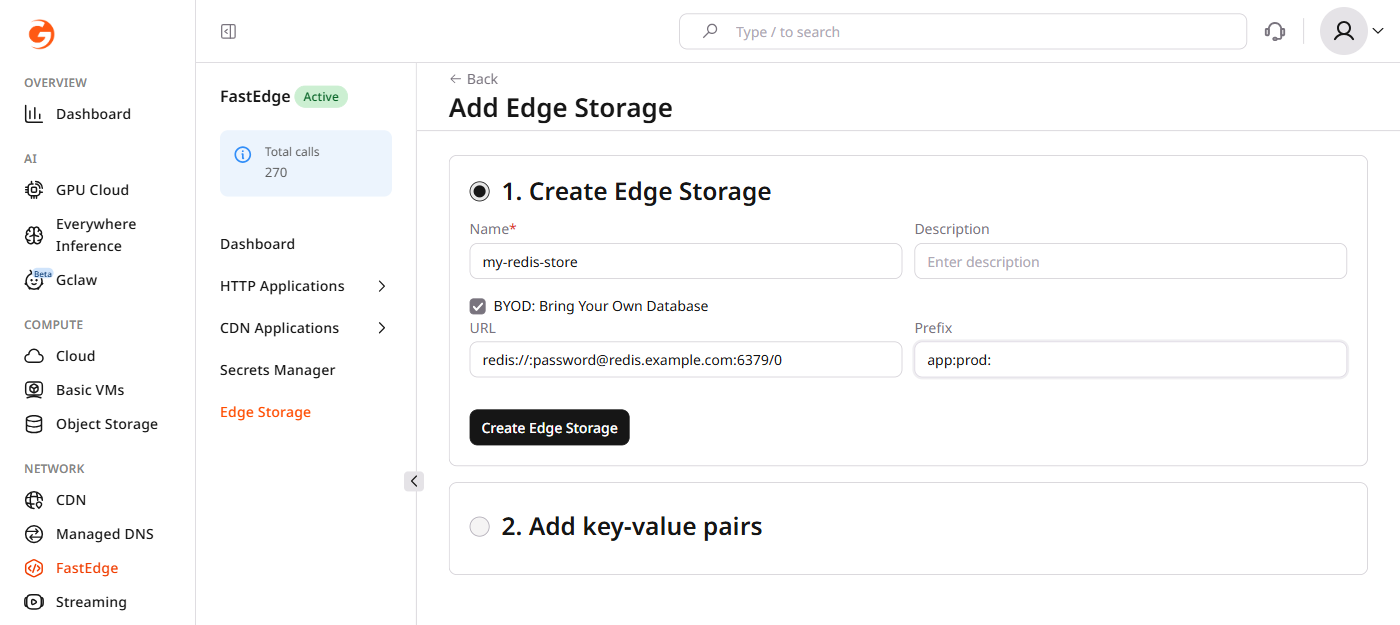
- Click Create Edge Storage to validate the connection and create the store.
Gcore validates the connection to the external store when clicking Create Edge Storage. If the connection cannot be established — for example, because the host is unreachable, the port is blocked, or the credentials are wrong — the store is not created and an error message is displayed. Verify that the store is publicly accessible and the URL is correct, then try again.
A store cannot be converted between BYOD and hosted storage after creation. The store type is permanent.
Link a BYOD store to an application
After creation, link the BYOD store to a Edgecompute application using the same process as a regular store — instructions are in Managing applications. Once linked, the application accesses the BYOD store through the standard SDK API. The prefix is applied transparently and the application code does not need to know whether the store is BYOD or hosted.